App home screen is managed from the admin panel under CMS➝ pages➝ App Home
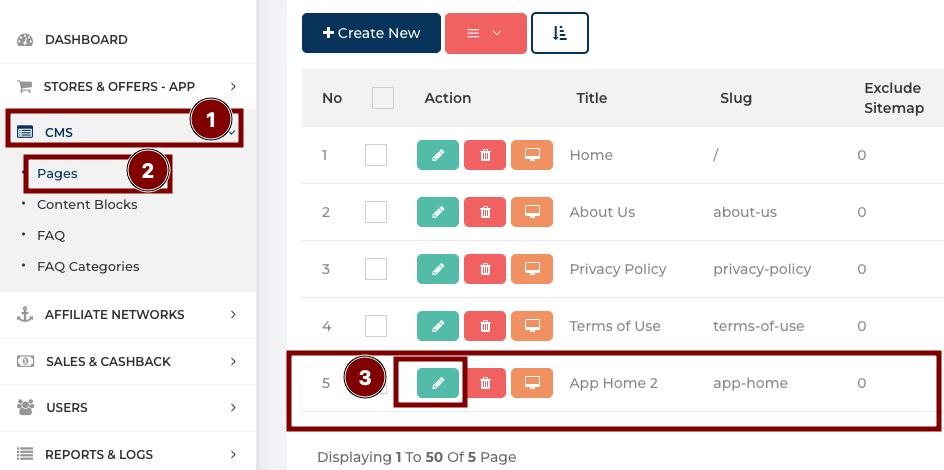
Note:- Content block on admin panel is arranged in sequence, which means on what position which block should be arranged in-app you can change the block sequence by positioning block one below another as you wanted to show it in-app
- Click on the edit button and you will be able to change the home screen setting as mentioned below:-
- To add a new home screen block click on the + icon below any block where you want to add

- Blocks that will be available for the app are:- Top Stores, Top Offers, Top Deals, Categories, Slider, Sections, Image Component
- You can add same multiple blocks for Top Stores, Top Offers, Top Deals, Categories and Image Component
Section #
- Section blocks can be used to show the static information of the app like how it works or other CTA sections
Slider #
- Generally, the slider block is positioned first on the app home screen.
- While adding a redirect link for the slider, keep the following points in mind.
- You can select link type, Internal link, External Link, or affiliate link.
- You can select link type, Internal link, External Link, or affiliate link.
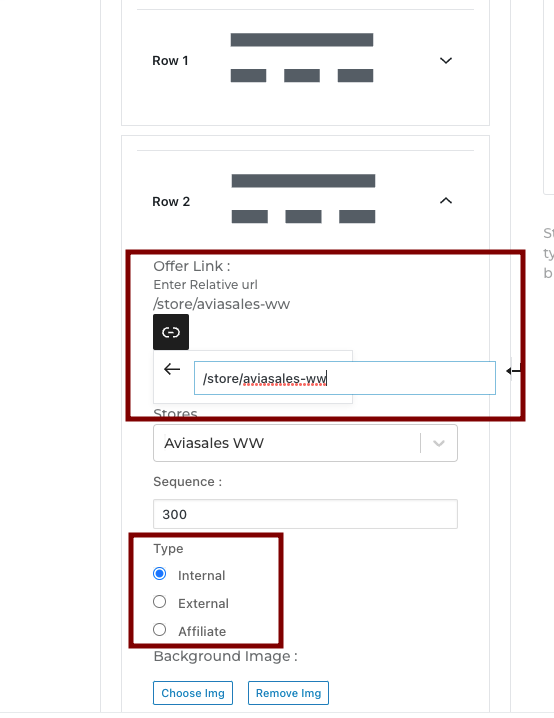
- For Internal link you should create link as define below.
- Link:- /RouteName/store_slug(if require)
ex:- /store/aviasales-ww
ROUTE_NAME:-
‘all-stores’: ‘AllStores’,
‘daily-deals’: ‘AllDeals’,
‘all-store-categories’: ‘AllStoreCategories’,
‘all-coupon-categories’: ‘AllCouponCategories’,
‘refer-n-earn’: ‘ReferNEarn’,
‘share-n-earn’: ‘ShareNEarn’,
‘coupon-category’: ‘CouponCatDetails’, // slug_requires
‘store-category’: ‘StoreCatDetail’, // slug_requires
‘store’: ‘StoreDetails’ // slug_requires
- Link:- /RouteName/store_slug(if require)
Image-Component #
- You can add multiple image component
- Image component only accept internal link , means it will always redirect to below mentioned screen in the app
- In redirect link section add the internal link as below
- Link:- /RouteName/store_slug(if require)
ex:- /store/aviasales-ww
ROUTE_NAME:-
‘all-stores’: ‘AllStores’,
‘daily-deals’: ‘AllDeals’,
‘all-store-categories’: ‘AllStoreCategories’,
‘all-coupon-categories’: ‘AllCouponCategories’,
‘refer-n-earn’: ‘ReferNEarn’,
‘share-n-earn’: ‘ShareNEarn’,
‘coupon-category’: ‘CouponCatDetails’, // slug_requires
‘store-category’: ‘StoreCatDetail’, // slug_requires
‘store’: ‘StoreDetails’ // slug_requires
Sliders #
Visit Content->Slider->Heading
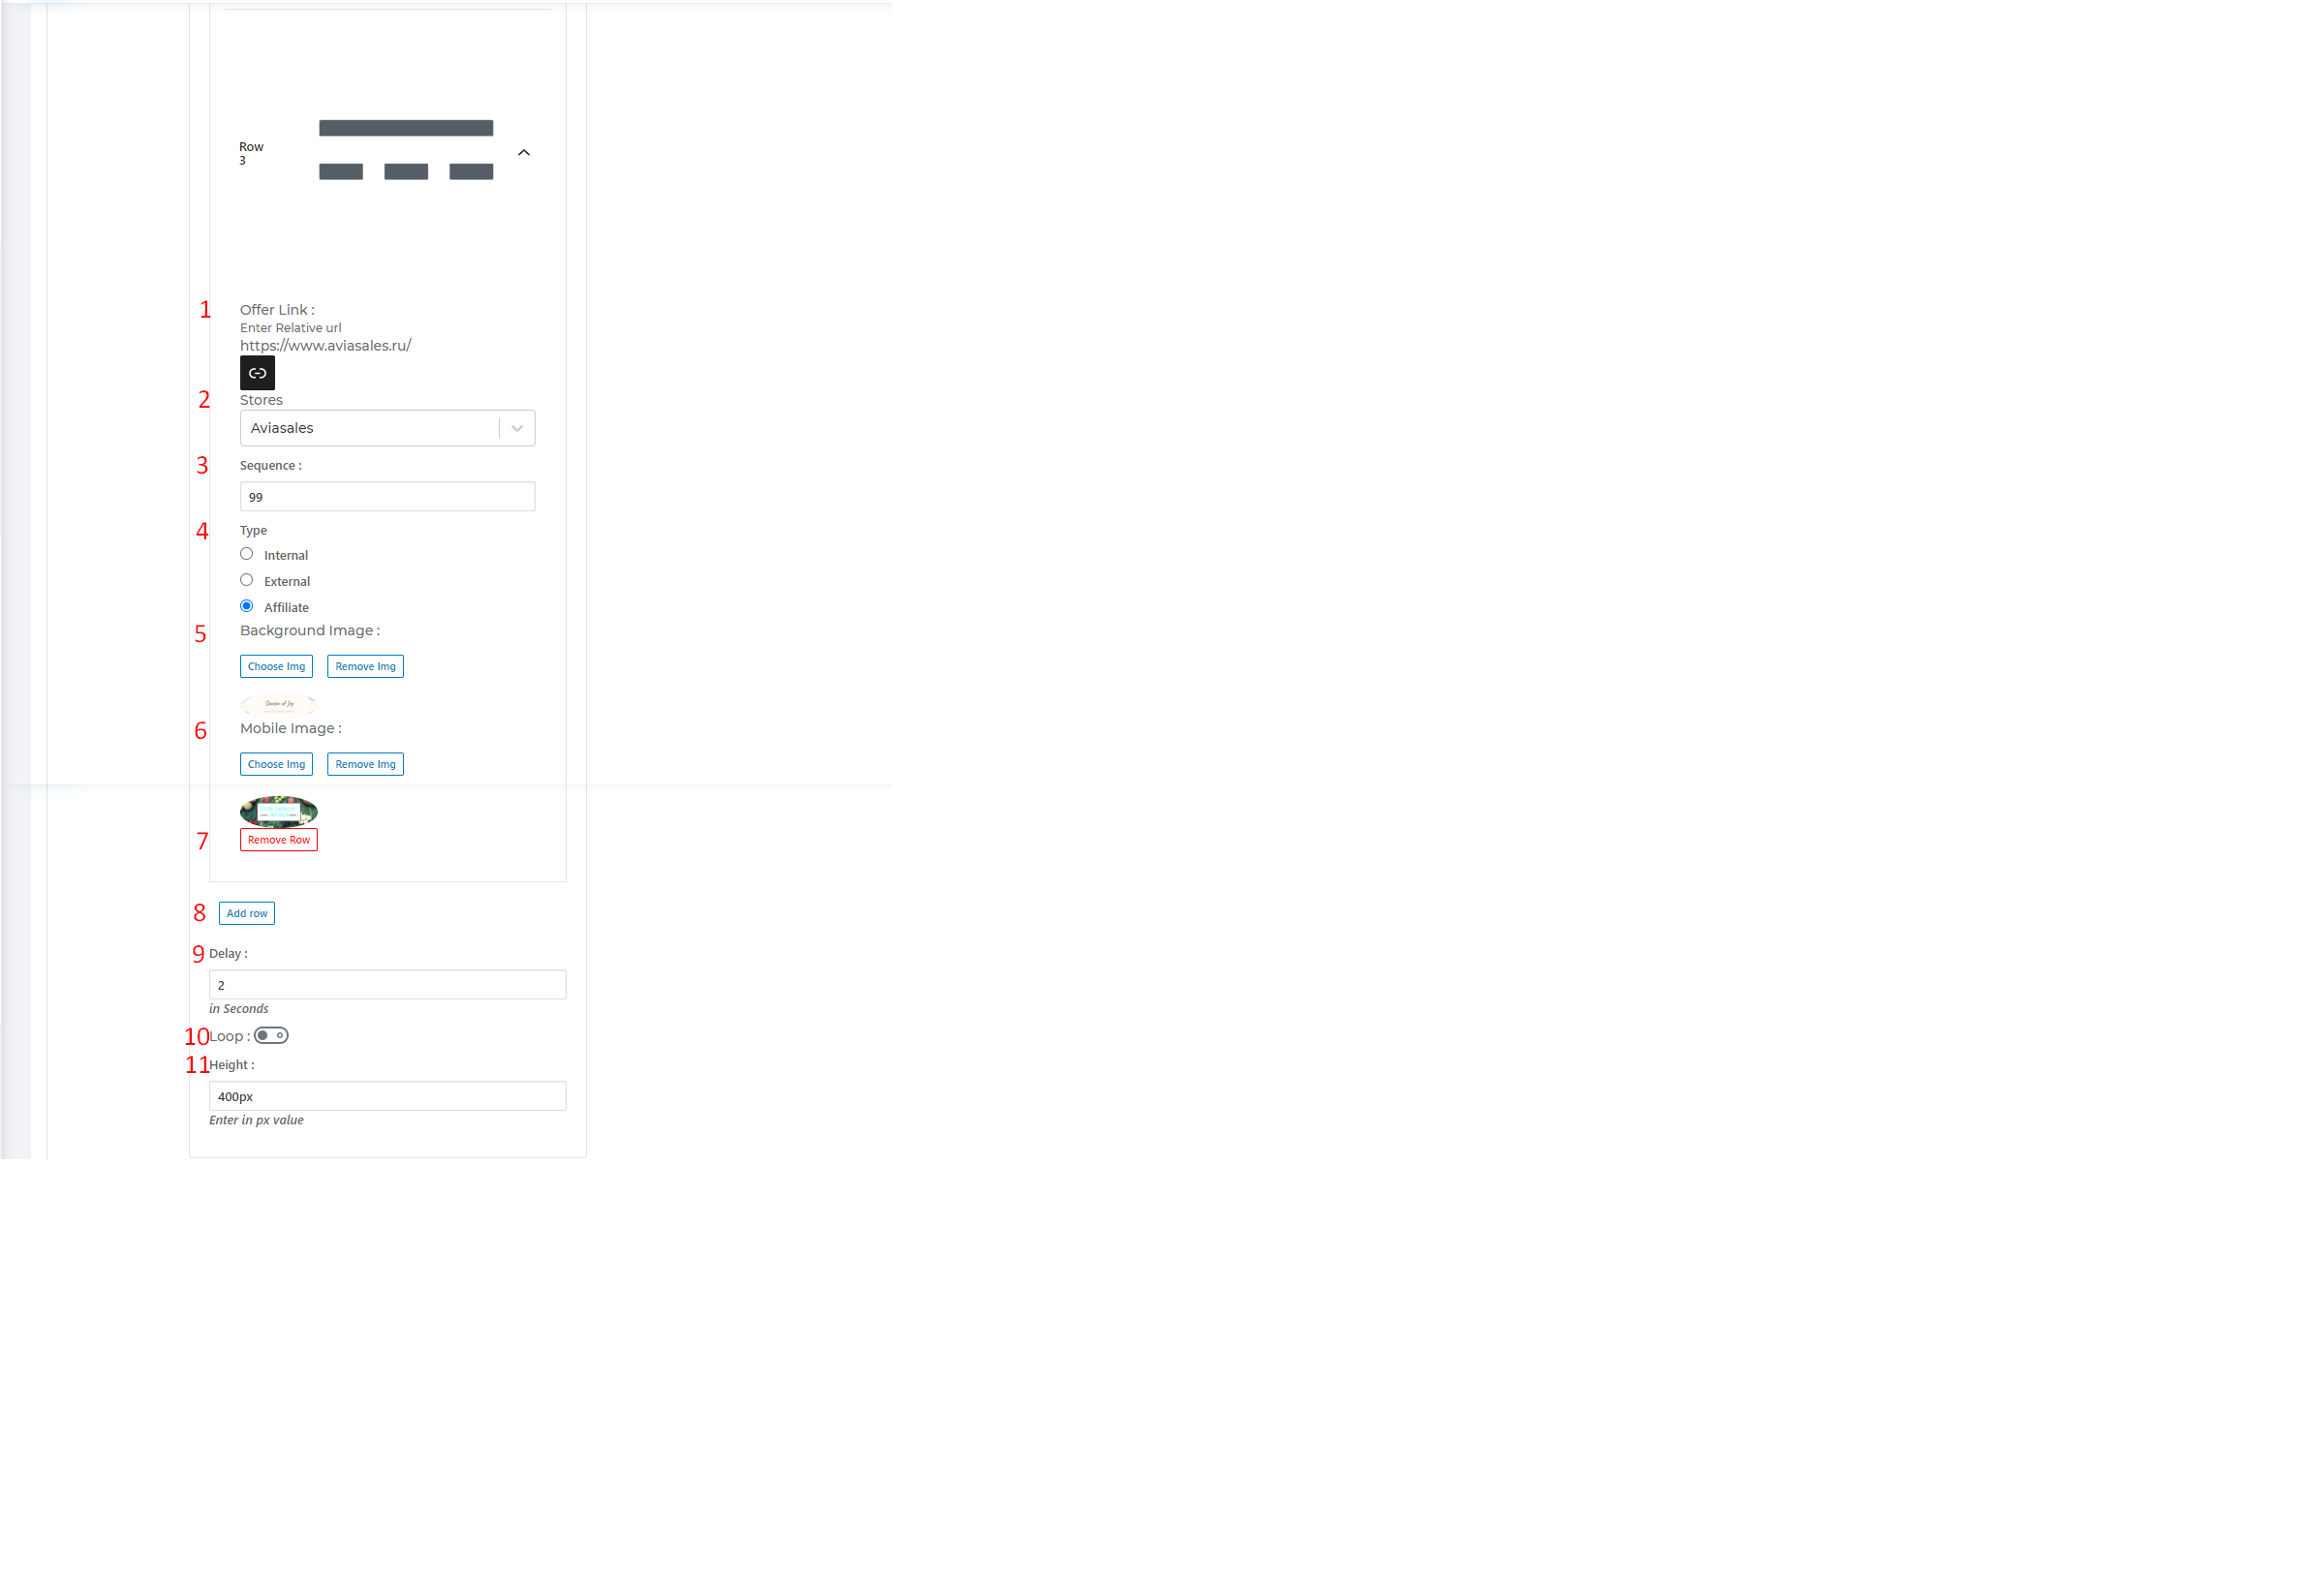
- Enter Relative URL in Offer Link.
- Select Stores name from the drop-down list.
- Enter Sequence no.
- Select Type from the radio button.
- Internal:- An internal link is one that points to another page on the same website
- External:- An external link points to one on another website entirely.
- Affiliate:- An affiliate link is a unique URL assigned to a specific affiliate. The affiliate link contains and records the affiliate’s ID or username, allowing the affiliate to get credit for the traffic sent to the advertiser’s website.
- Choose the Background Image and also Remove Image by clicking on the button.
- Choose the Mobile Image and also Remove Image by clicking on the button.
- Remove a row by clicking on the Remove Row button.
- Add a row by clicking on the Add Row button.
- Enter Delay timing of slider i.e change the delay time for every slide.
- If Loop is ON you do not see the next arrow on the last slide otherwise by default this arrow is present on the last slide.
-Note:- By default all sliders do an “infinite loop” so that you can go through all slides using e.g. just the next arrow. This arrow is present on the last slide, too, and makes the slider go to the first slide, restarting the slideshow.
11. Height of the Image.
Stores #
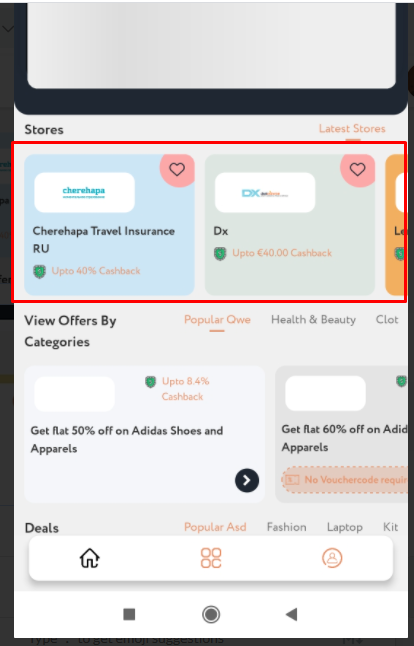

Visit Content->Top Stores
- Enter Title name.
- Enter Description related to the title if any.
- When Common Listing First Tab is ON, the content is going to show on the first tab. When disabled the content is not going to show.
- Enter Common Listing Label name.
- Select Common Listing Logic from the drop-down list.
- Store Categories block.
- Select Store Categories from the drop-down list.
- Select Multiple stores from the drop-down list.
- Click on the Remove Store Category button to remove store categories.
- Click on the Add Store Category button to add store categories.
- Select Store Listing Logic from the drop-down list.
- Enter the Count value that how many no. of store categories displayed.
- Select Style from the drop-down list.
Offers #
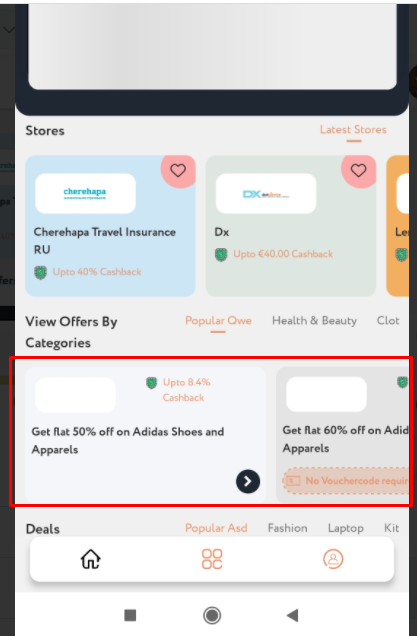
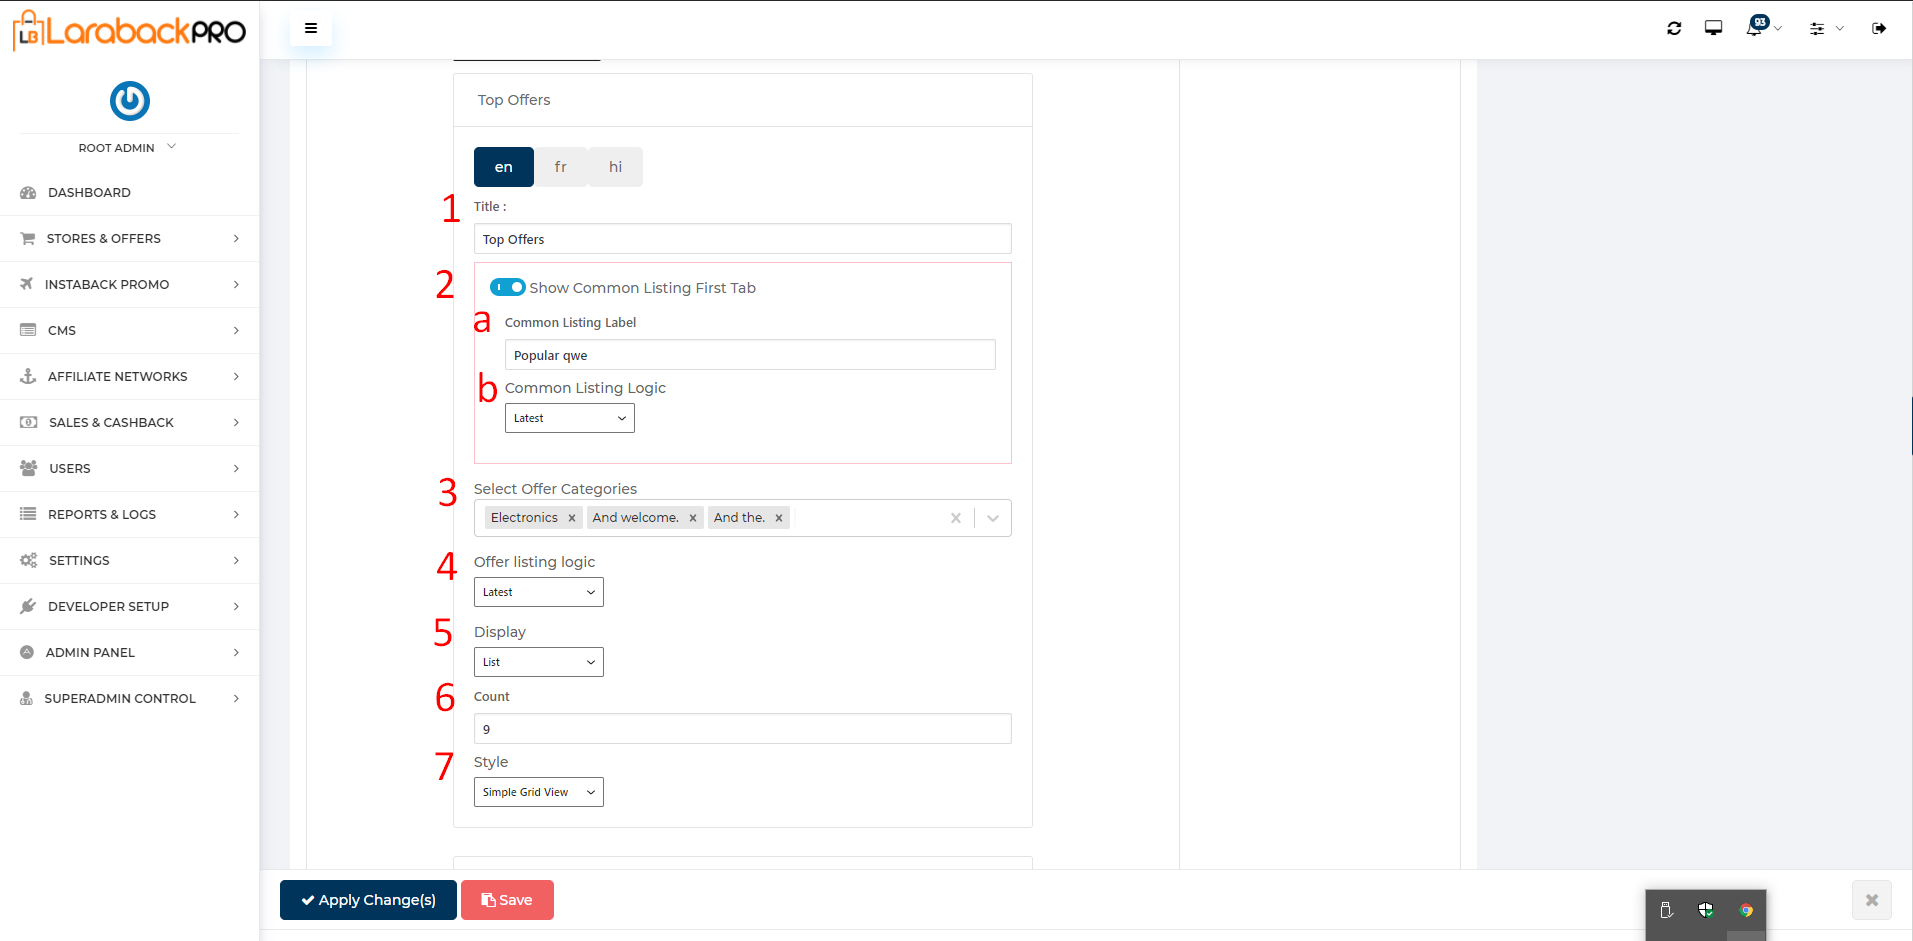
Visit Content->Top Offers
- Enter Title name.
- When Common Listing First Tab is ON, the content is going to show on the first tab. When disabled the content is not going to show.
- Enter Common Listing Label name.
- Select Common Listing Logic from the drop-down list.
- Select Multiple Offer Categories from the drop-down list.
- Select Offer Listing Logic from the drop-down list.
- Select Display from the drop-down list.
- Enter the Count value that how many no. of offers displayed.
- Select Style from the drop-down list.
Deals #
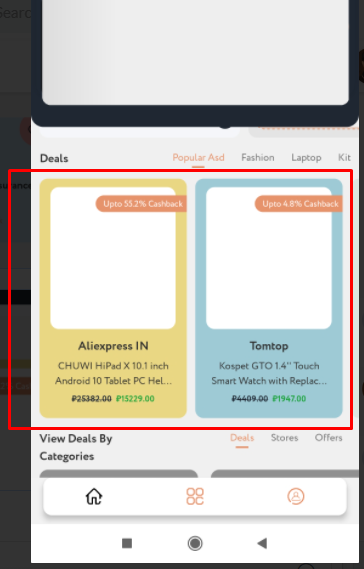
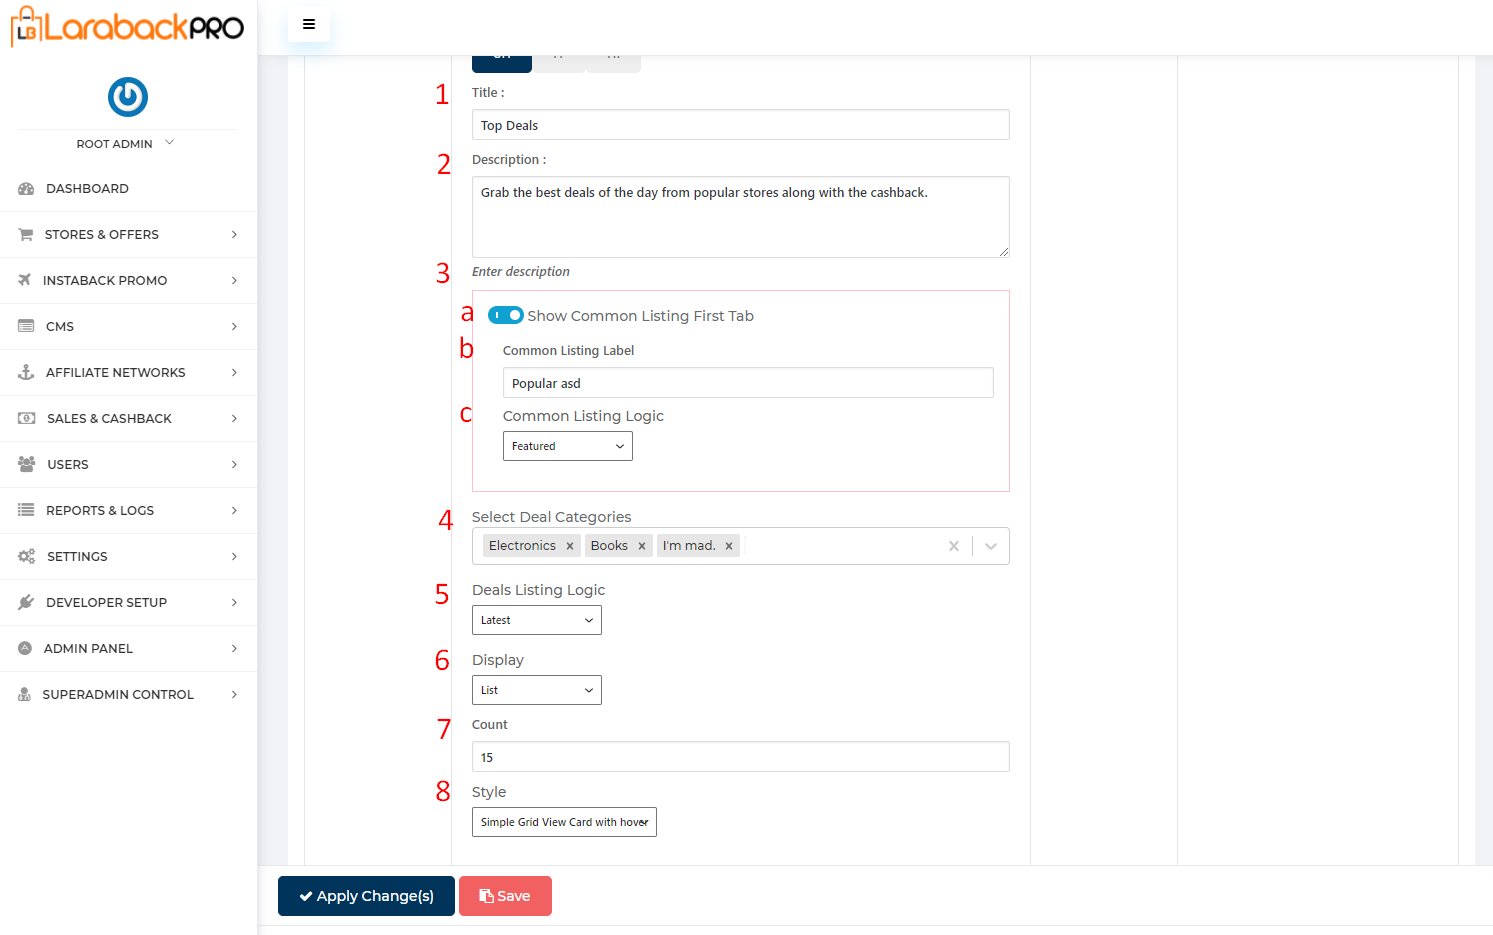
Visit Content->Top deal
- Enter Title name.
- enter Description related to the title.
- When Common Listing First Tab is ON, the content is going to show on the first tab. When disabled the content is not going to show.
- Enter Common Listing Label name.
- Select Common Listing Logic from the drop-down list.
- Select Multiple Deal Categories from the drop-down list.
- Select Deals Listing Logic from the drop-down list.
- Select Display from the drop-down list.
- Enter the Count value that how many no. of deals displayed.
- Select Style from the drop-down list.


