User Registration #
Signup
#

- Enter your valid email Address on which you want to registered your account.
- Enter the password
- Enter the referral code if you have any (I.E optional).
- Tick mark on the checkbox to accept its terms of use & privacy policy.
- click on the sign up button.
- Note:- After that you are going to registered and welcome to you on the homepage.
Email verification #
- After registration you have got one mail on your registered email id to verify your email.
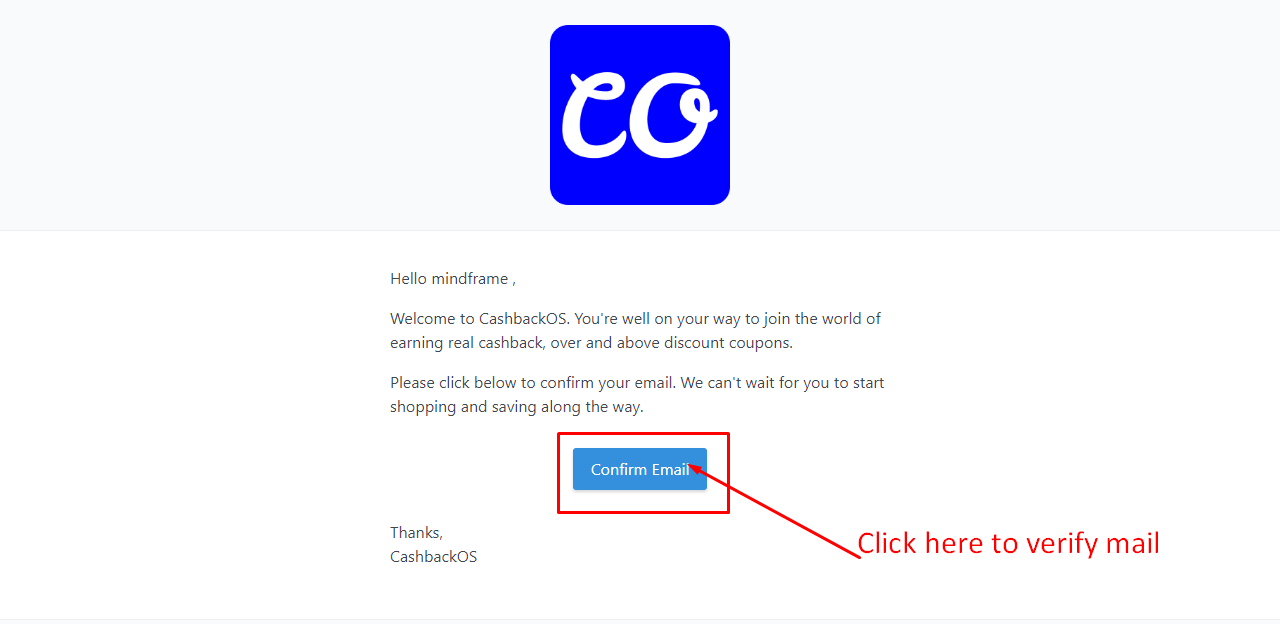
- Click on verify email Address to verify it.
- Note:- If you don’t get any mail you can resend mail by going to the user panel dashboard->paymentSee the below image

Phone number verification #
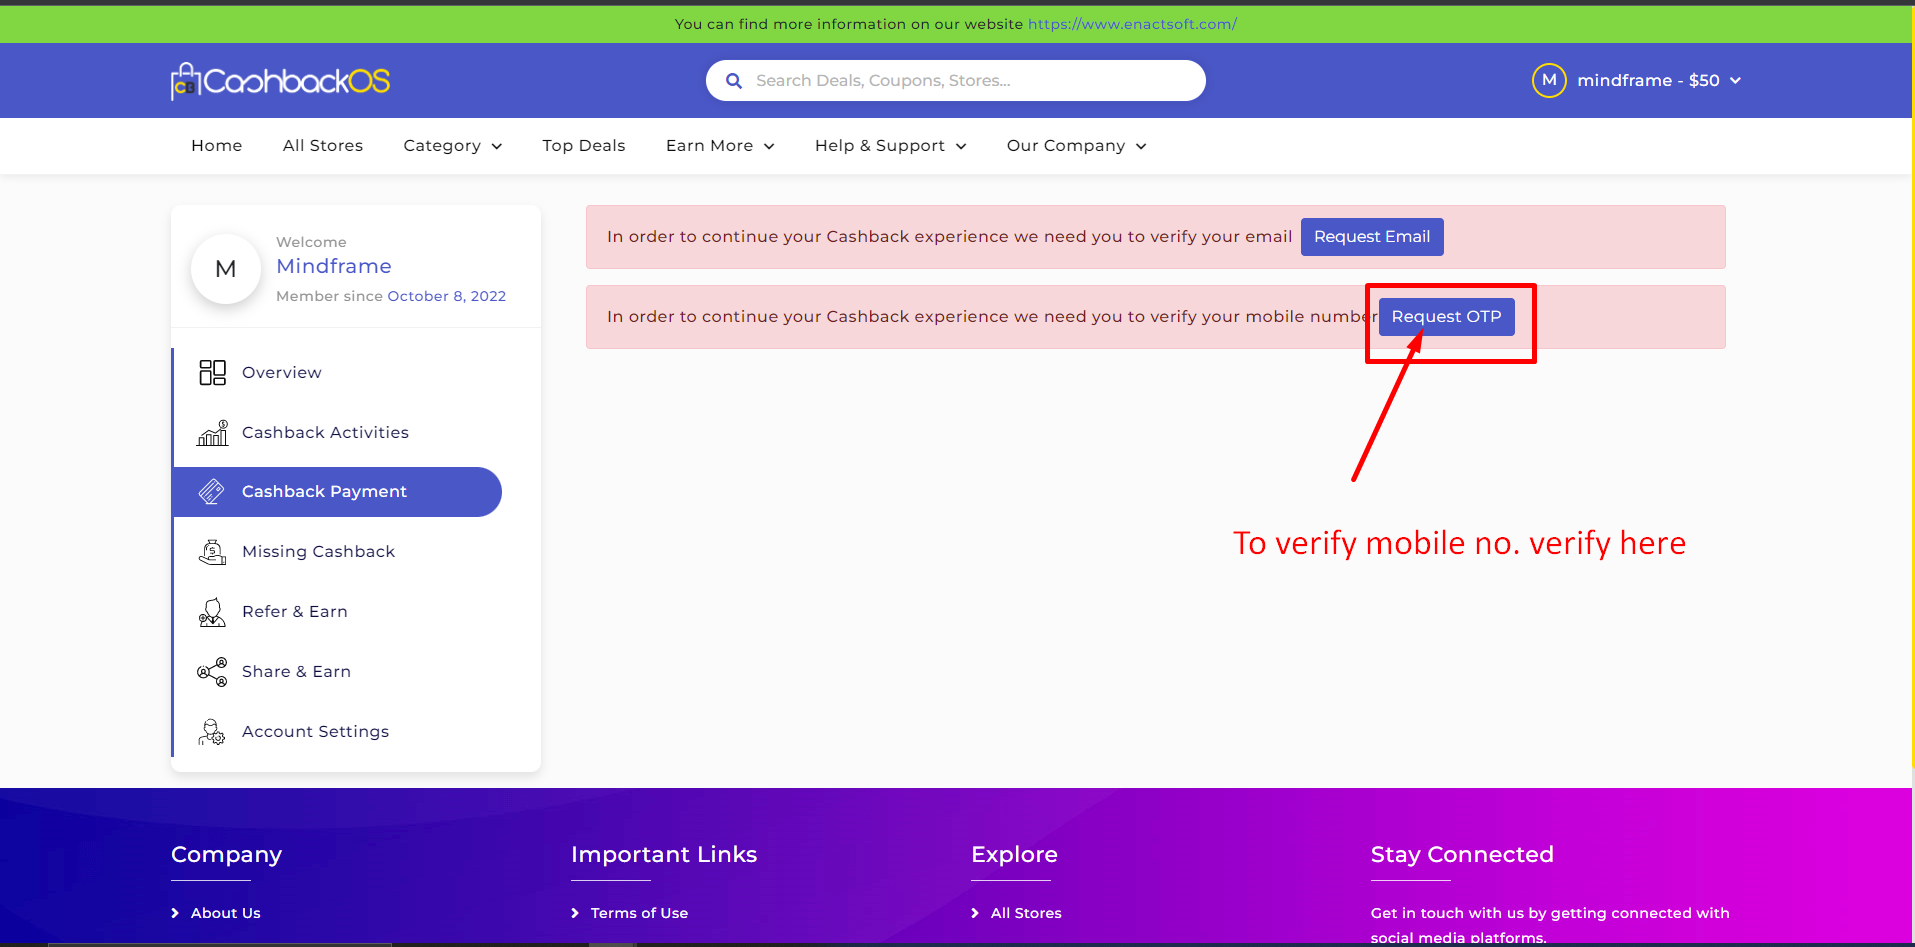
- To verify your mobile no click on the request OTP button.
- you are going to redirect on this window as shown below.
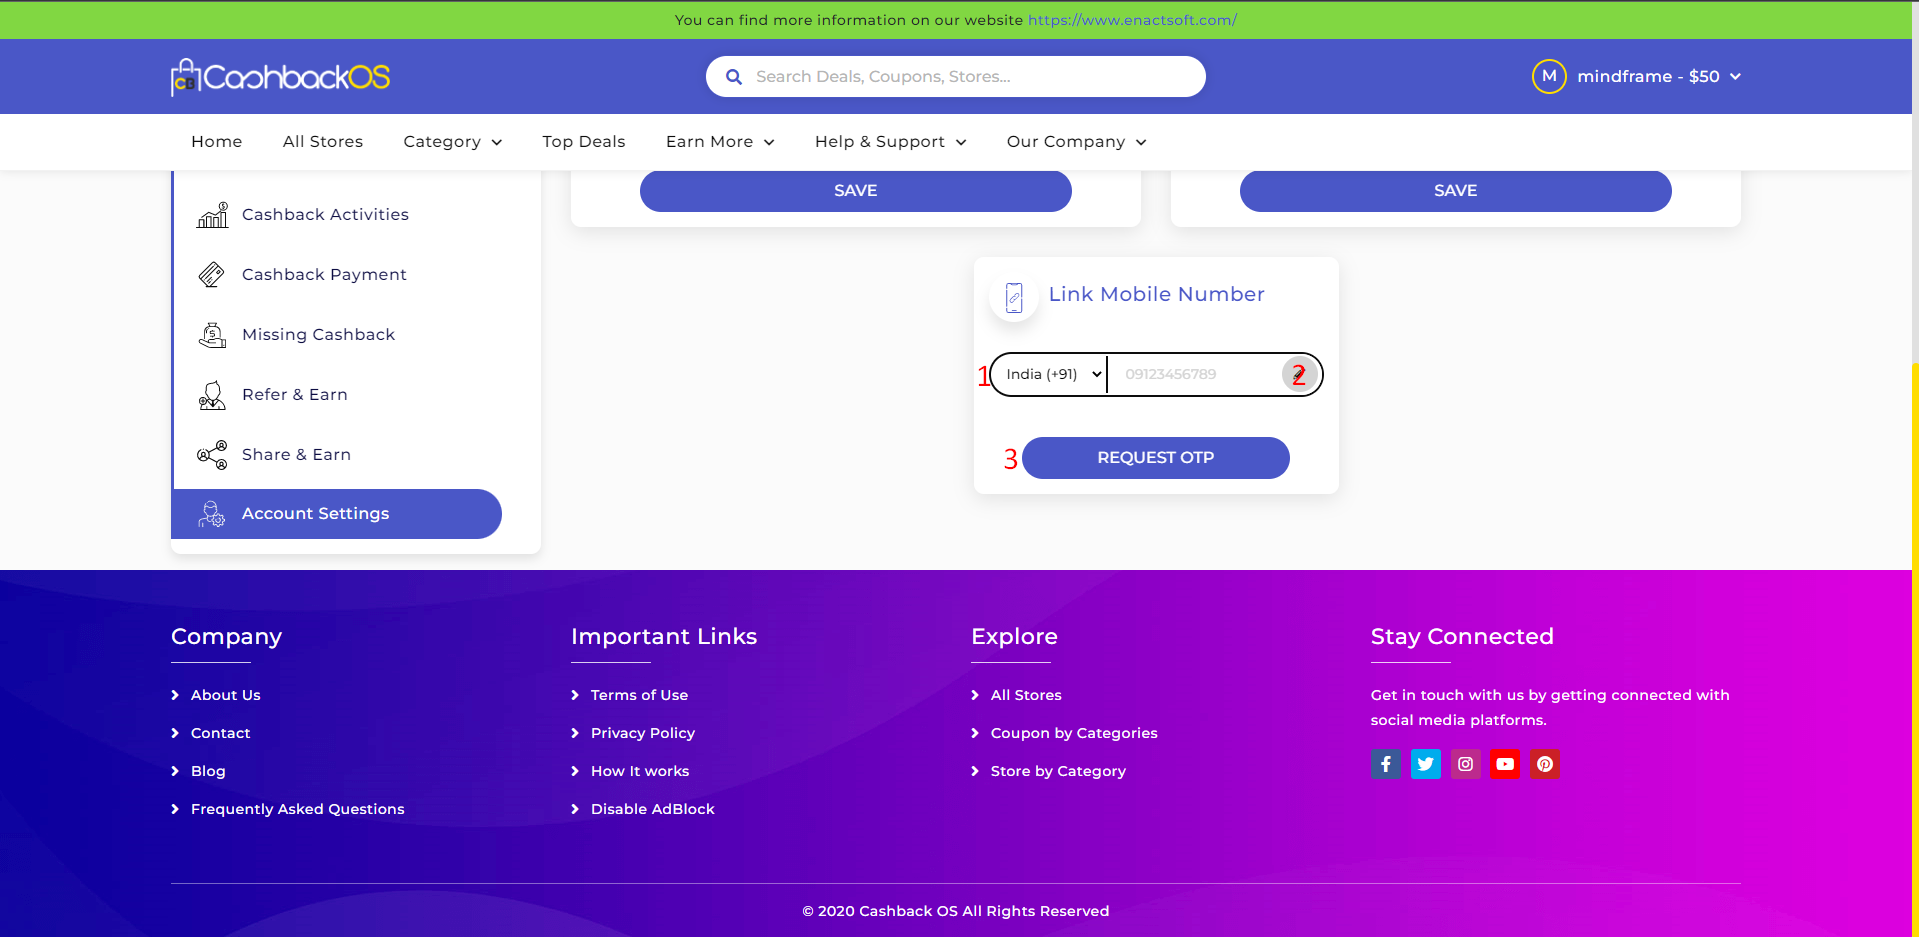
- Select country dialing code from the drop-down list.
- Enter your mobile no.
- click on the Request OTP button.
- Note:- Now enter the OTP which you received on your registered mobile no and click on the submit button.

Transaction journey #
Click on shop/coupon/deal #
Visit Home page->All store

Click log #
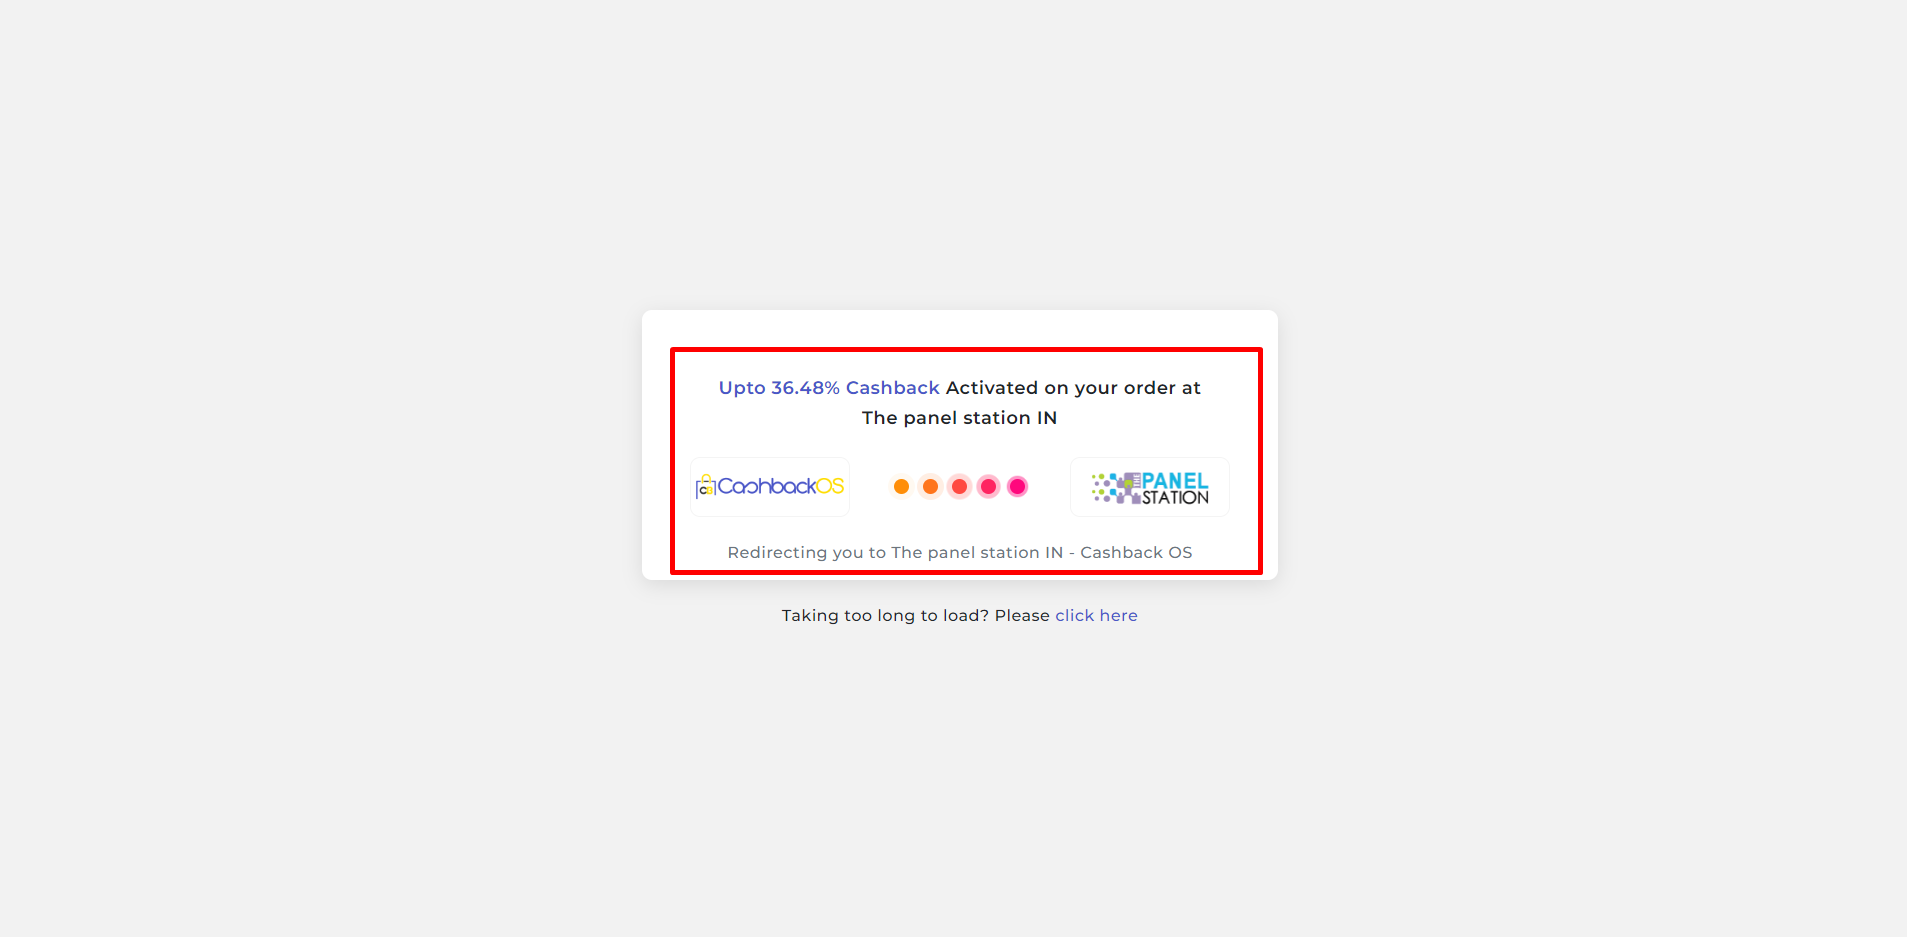
- click on the shop now button of the store/deal/coupons
- This window appears as shown in the below image.
- The click log entry is shown in the Admin panel->User requests->click history
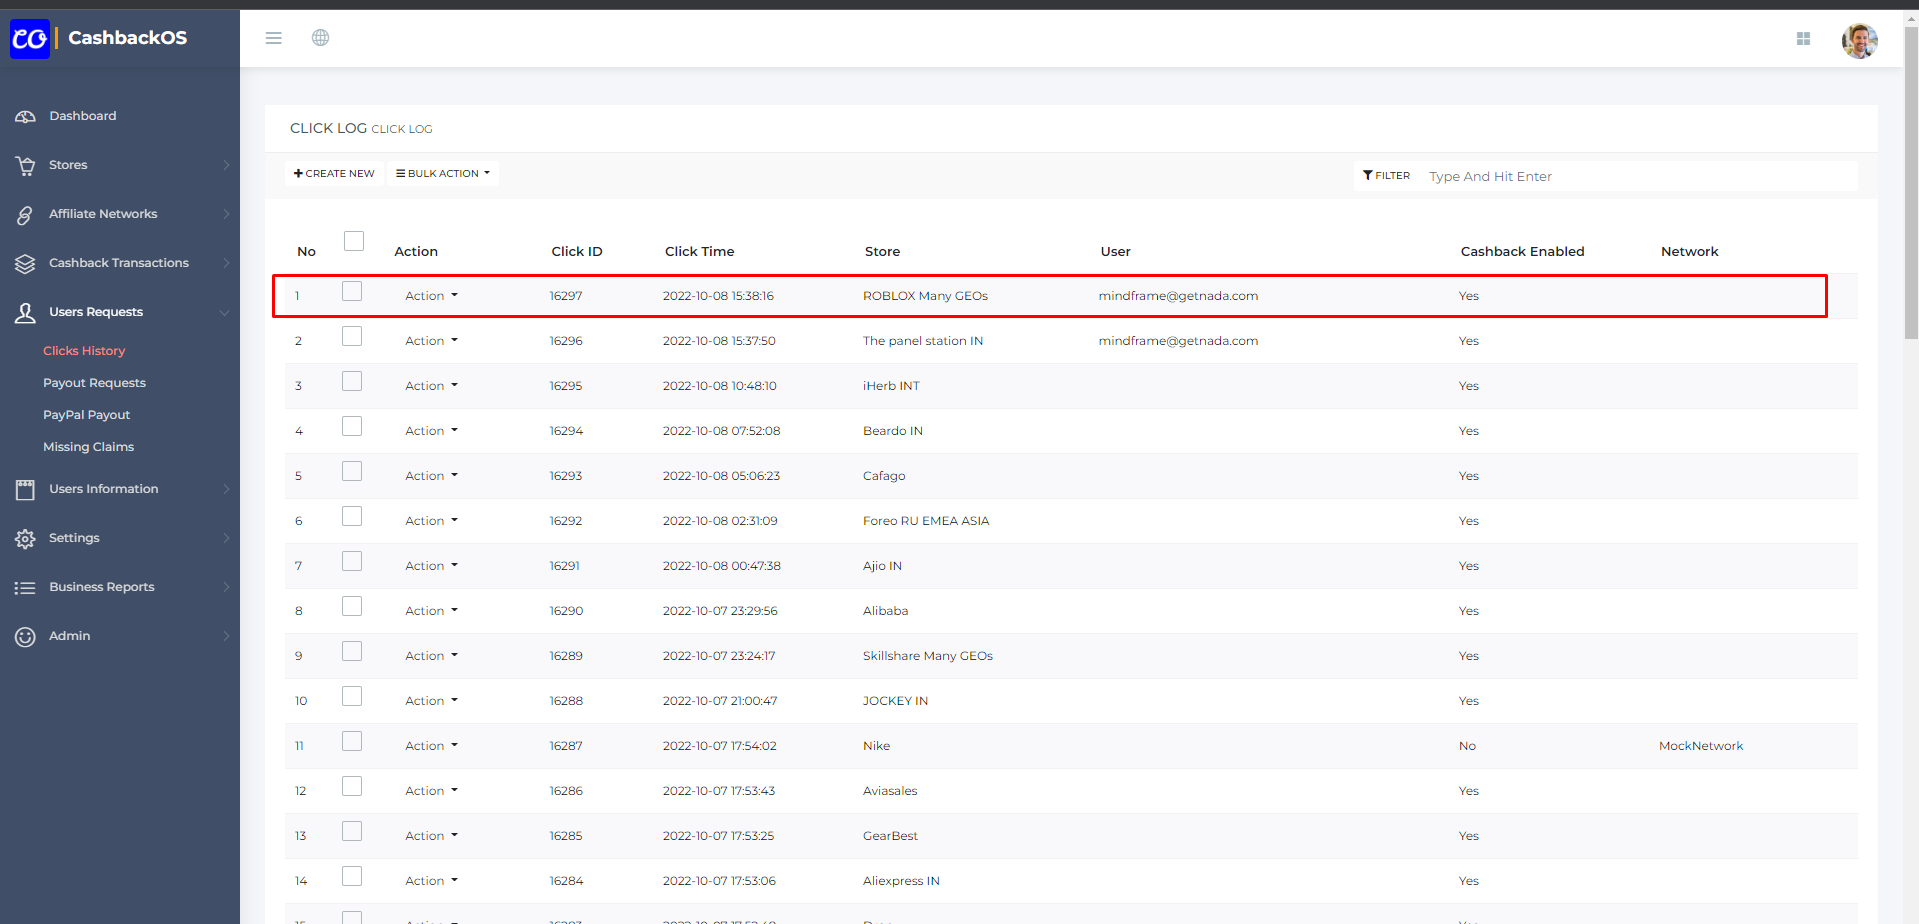
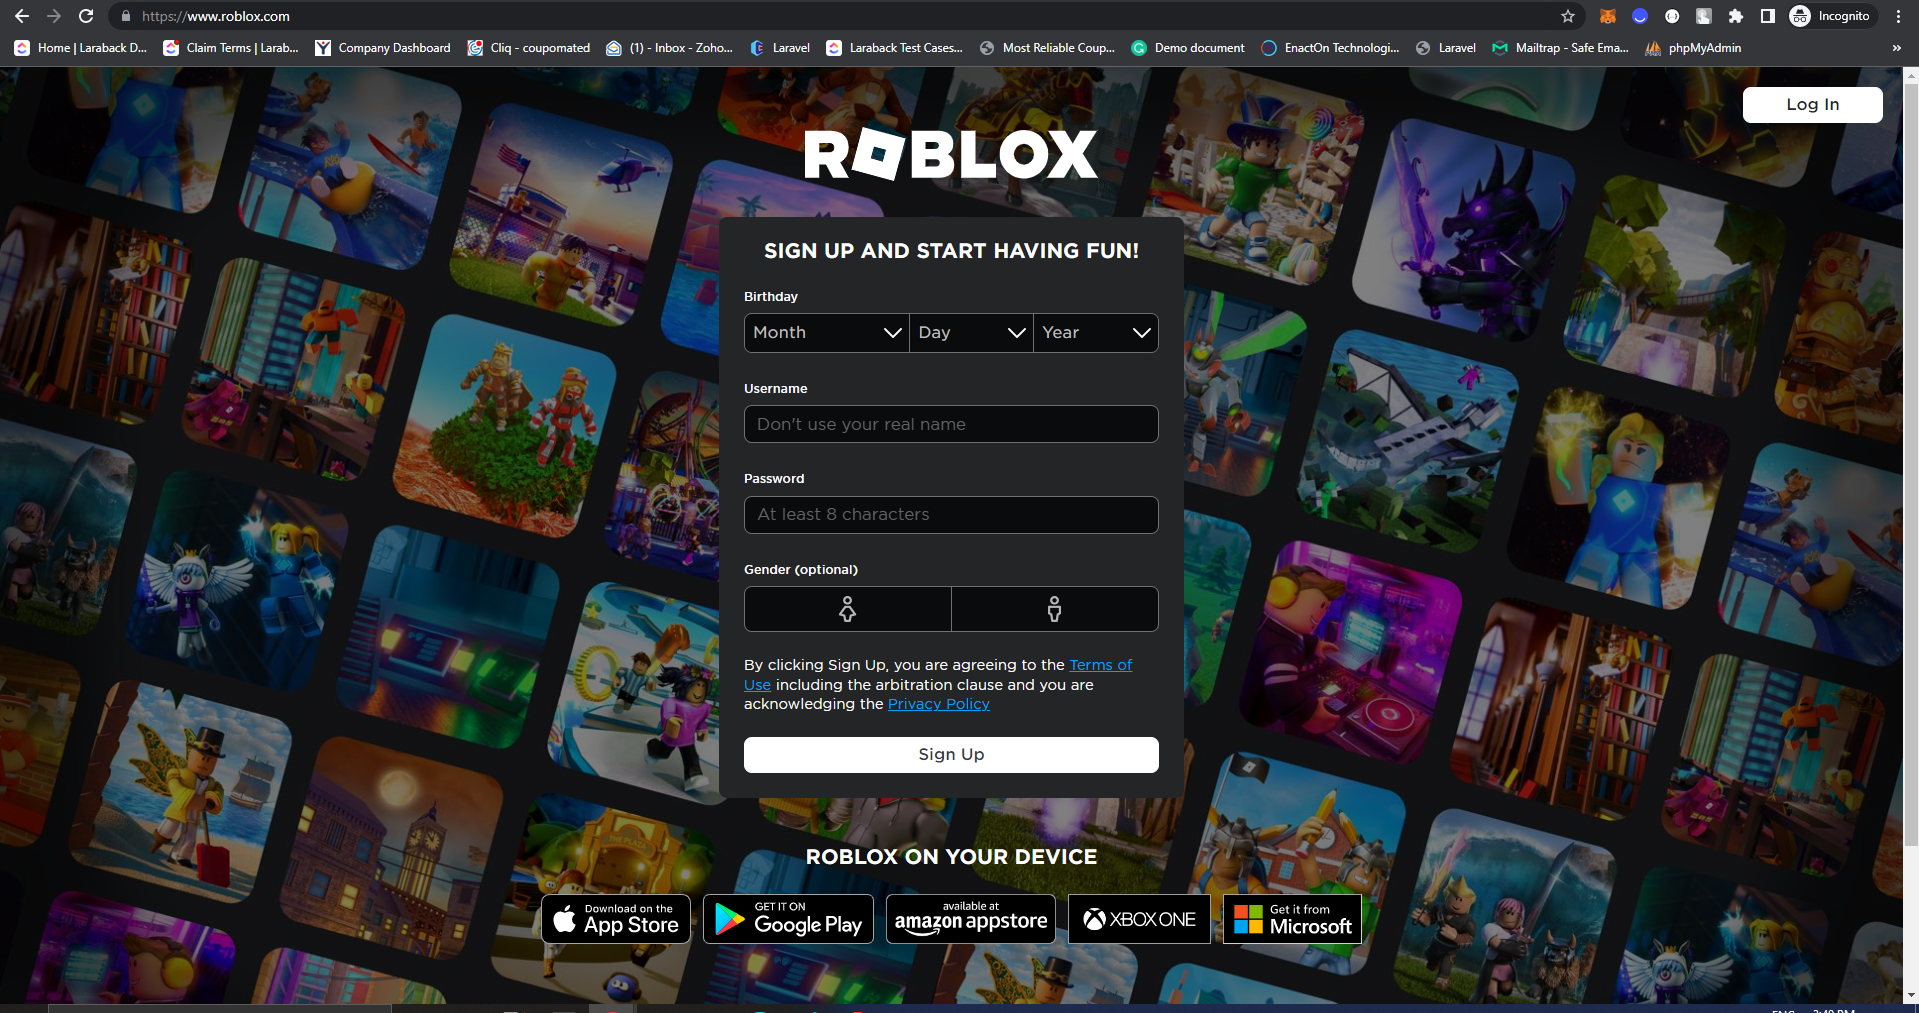
- Note:- Now user is going to the merchant site shop the specific product as per their choice.
Conversion from network #
User email notification – transaction status updated. #
- Now one email received to your registered mail id
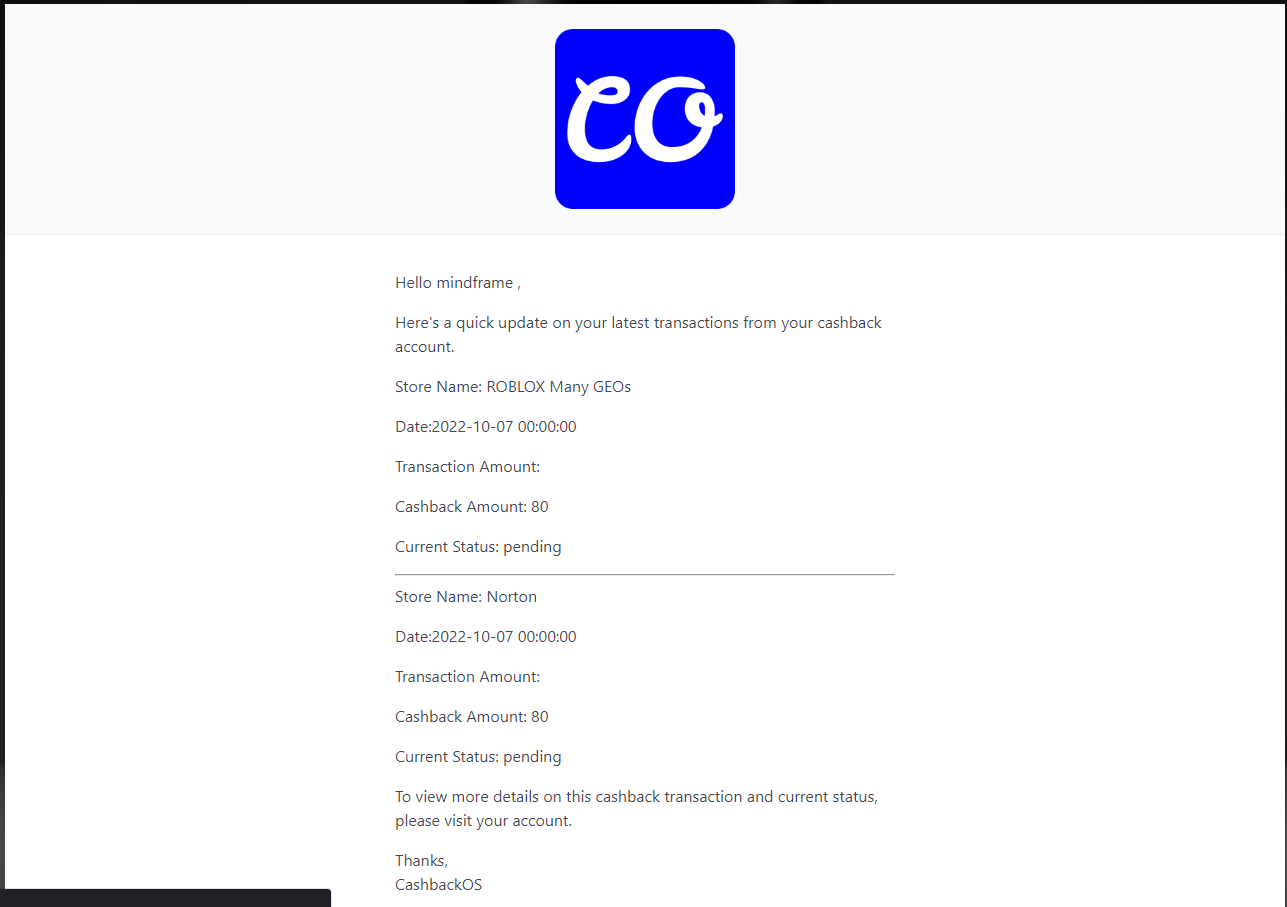
Note:- All the things related to your shopping is mentioned within it like:- Store name, Date, Transaction amount, cashback amount, donation amount & status
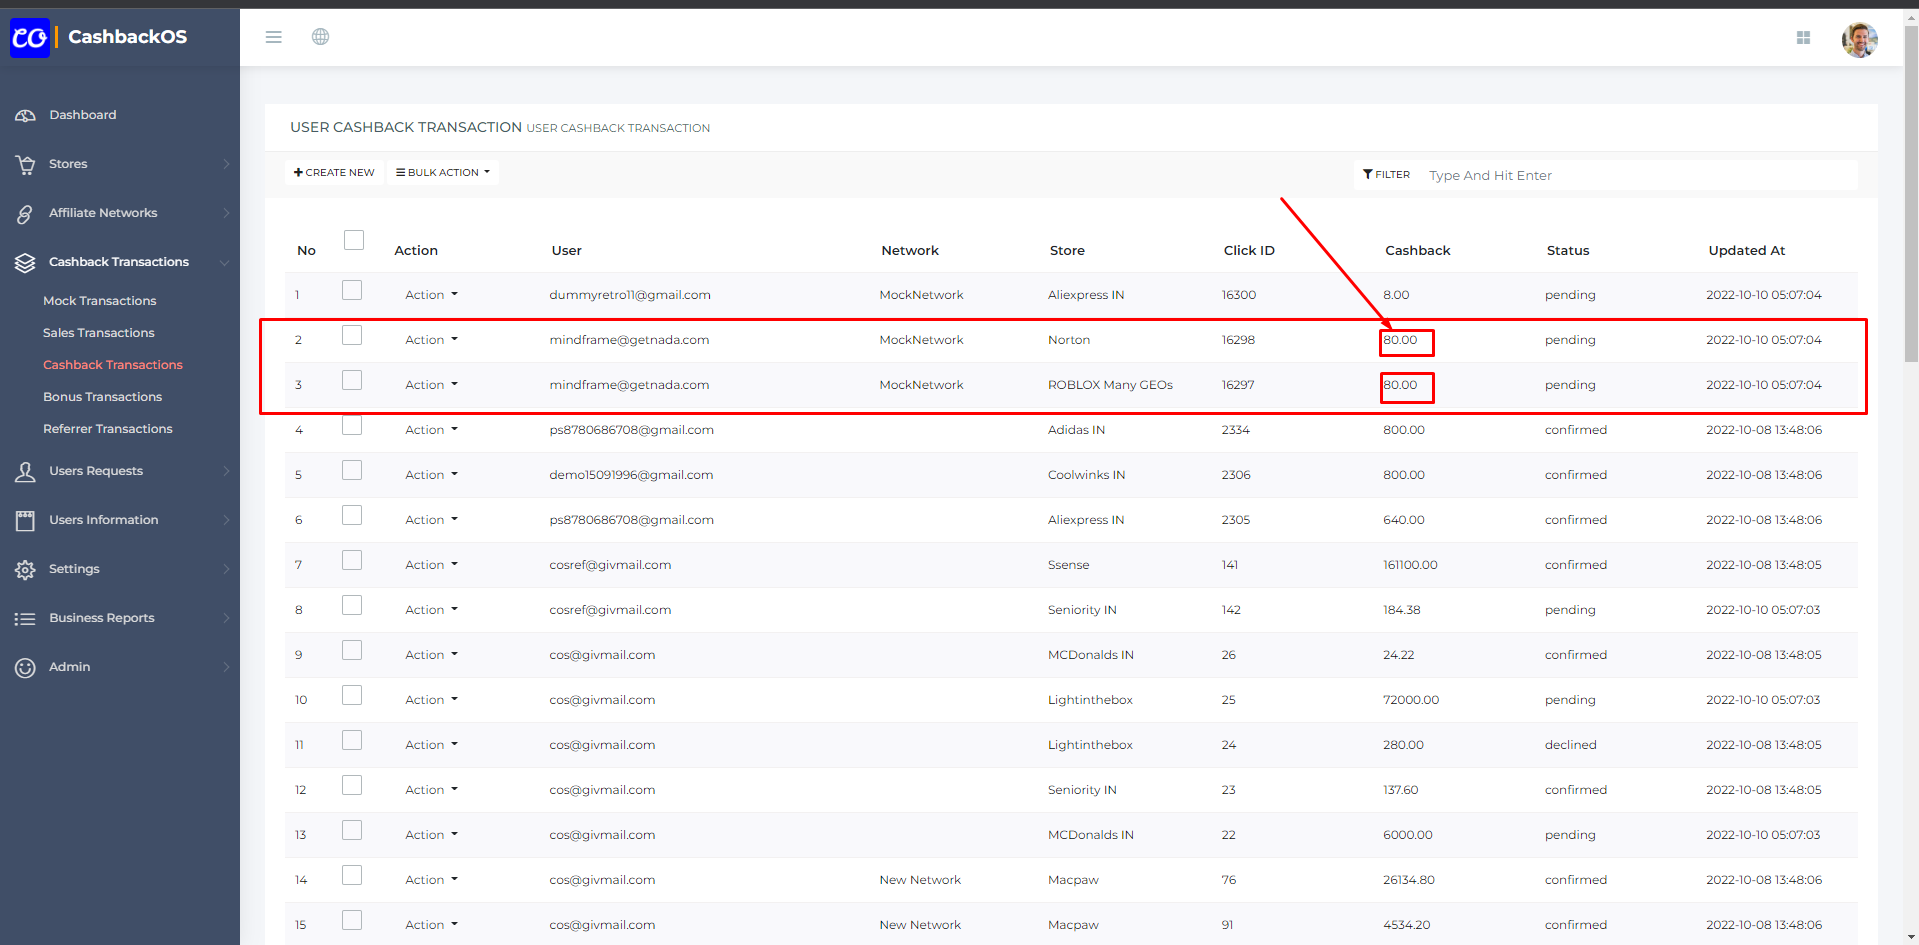
Automated calculation and cashback assigned to user as per settings at the time click
#
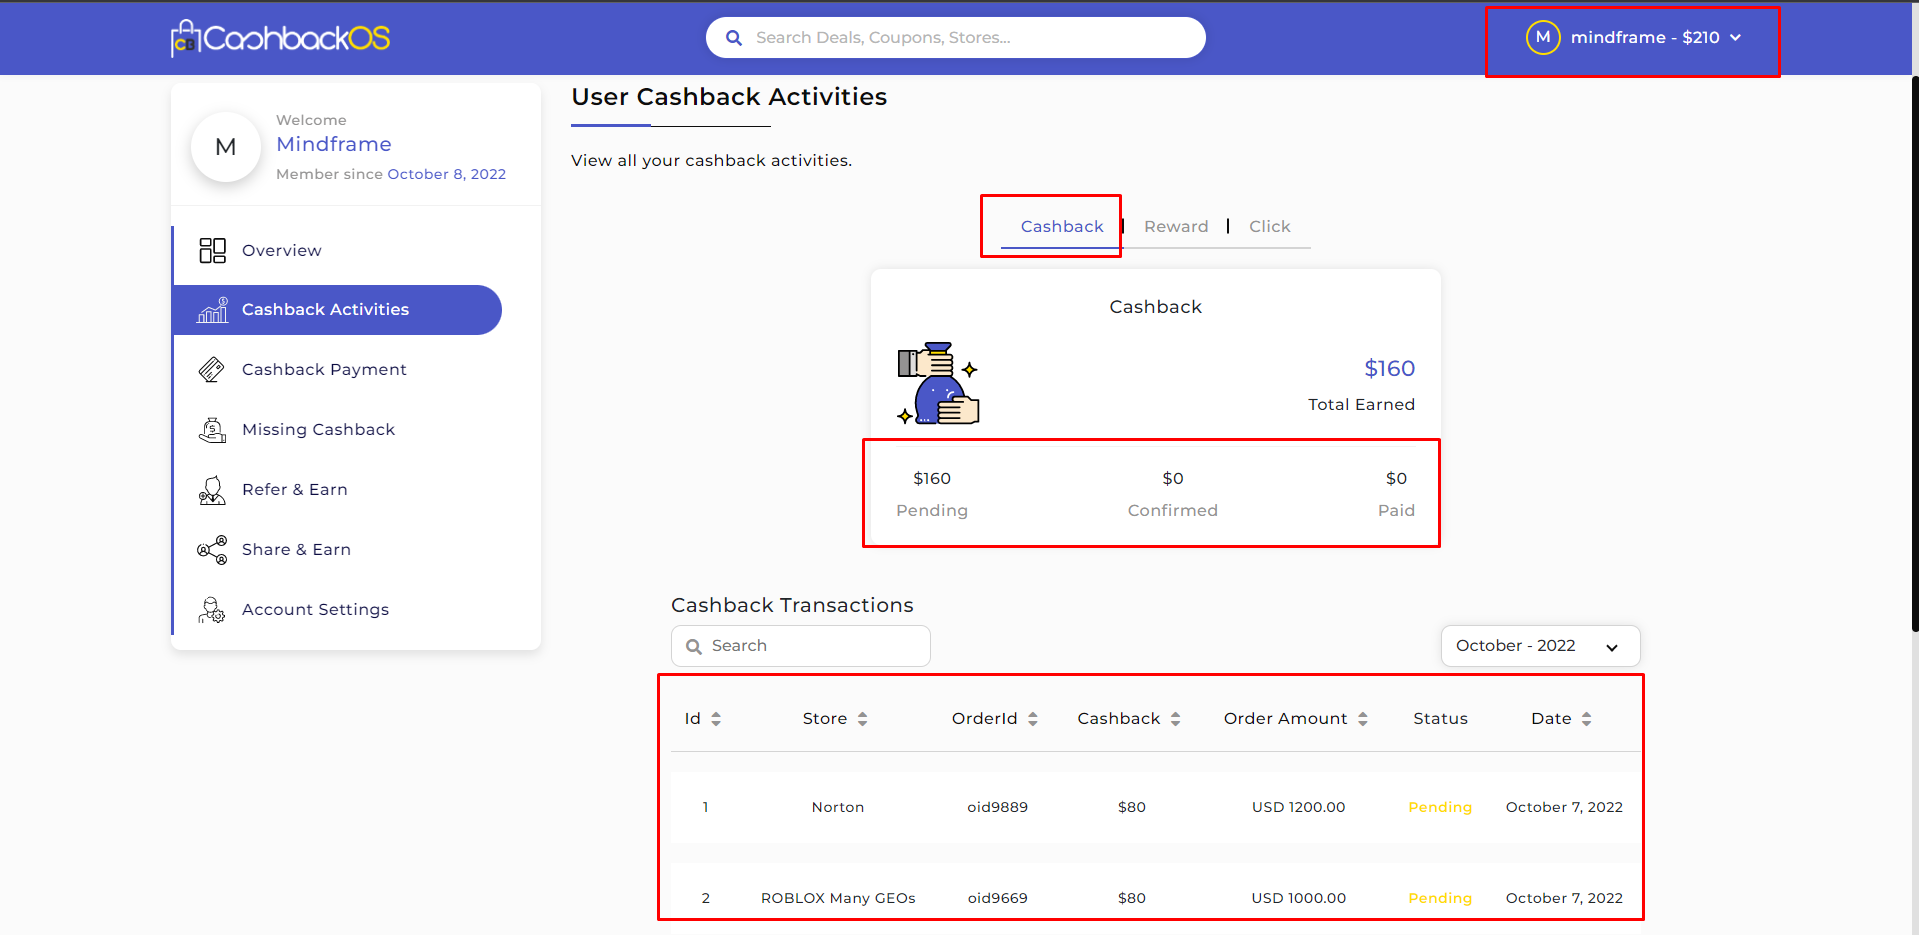
- As per the setting 80% cashback
- Here commission amount is 100 and so 80% of 100=80 assigned as a cashback.
- Note:- Visit the Admin panel->cashback transaction->sales transaction & cashback transaction you will get better idea.
Transaction status #
Network status change #
- Initially transaction is captured with PENDING and after few weeks, network updates it as CONFIRMED or DECLINED
Confirm days form network settings #
visit admin panel->affiliate networks

- From here you can create your new affiliate network and add the confirmation days and the other details.
User email notification – transaction status updated. #
- After the confirmation user again received the mail that their bonus of the transaction is confirmed.
User payout request #
Cashback payment request #
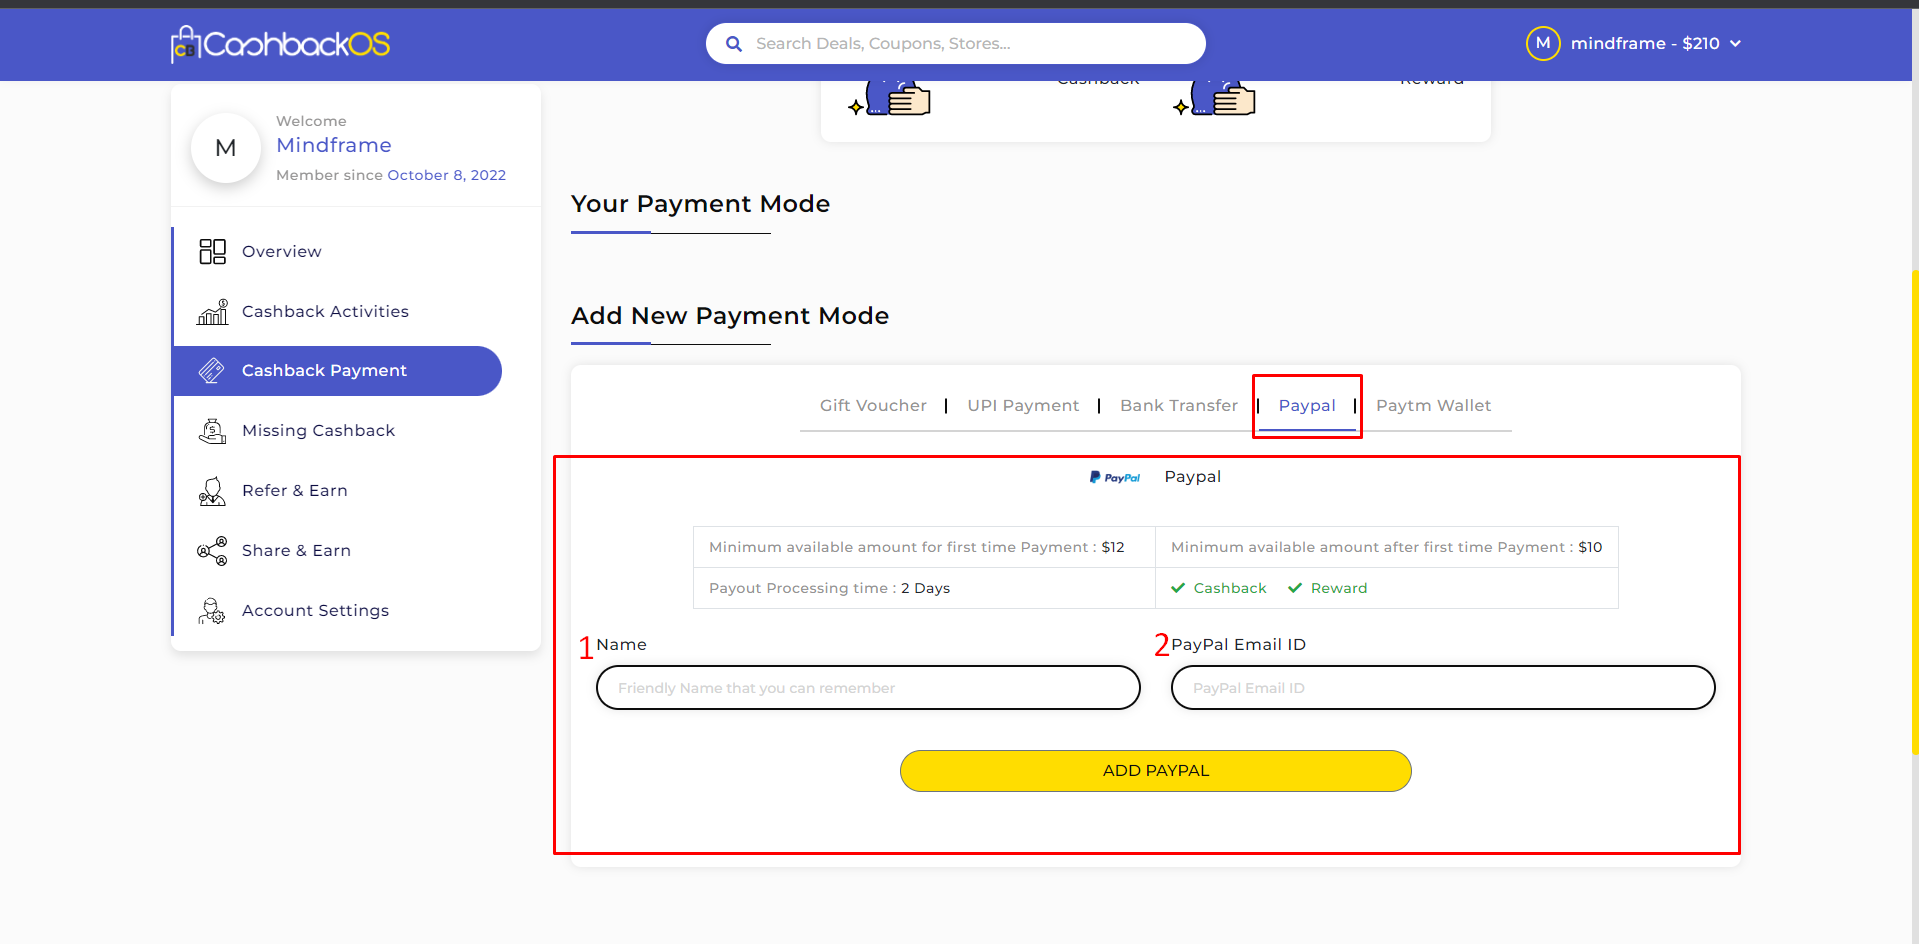
Note:- Here you can add different types of payment like here shown in the above image I.E Gift voucher, UPI payment, Bank transfer, PayPal All have different levels of minimum available amount in your account and payout processing time
- Enter the name
- PayPal email id on which you want to received your cashback amount & press on add button
Cashback payment request processing #
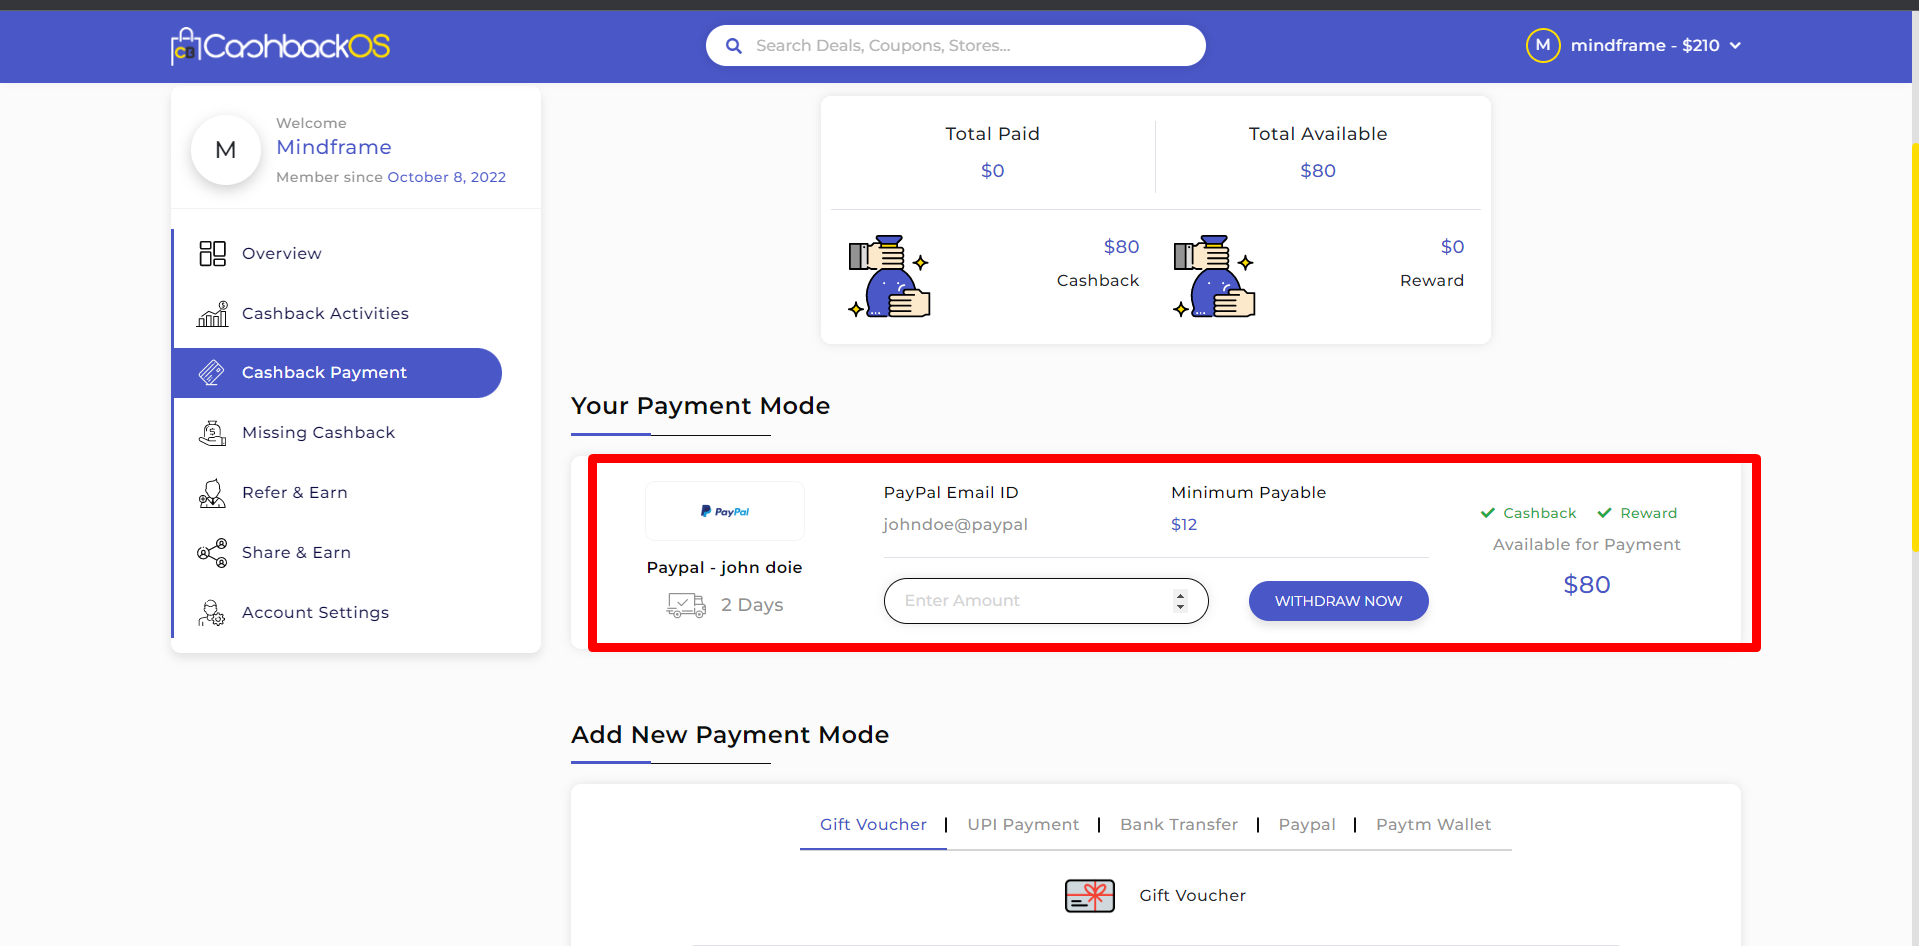
- Now add the amount you want to process for the request.
- Note:- Keep in mind the amount match with the minimum payable amount and available cashback in your account that is shown

- Here user payment created.
- Here user gets the payment
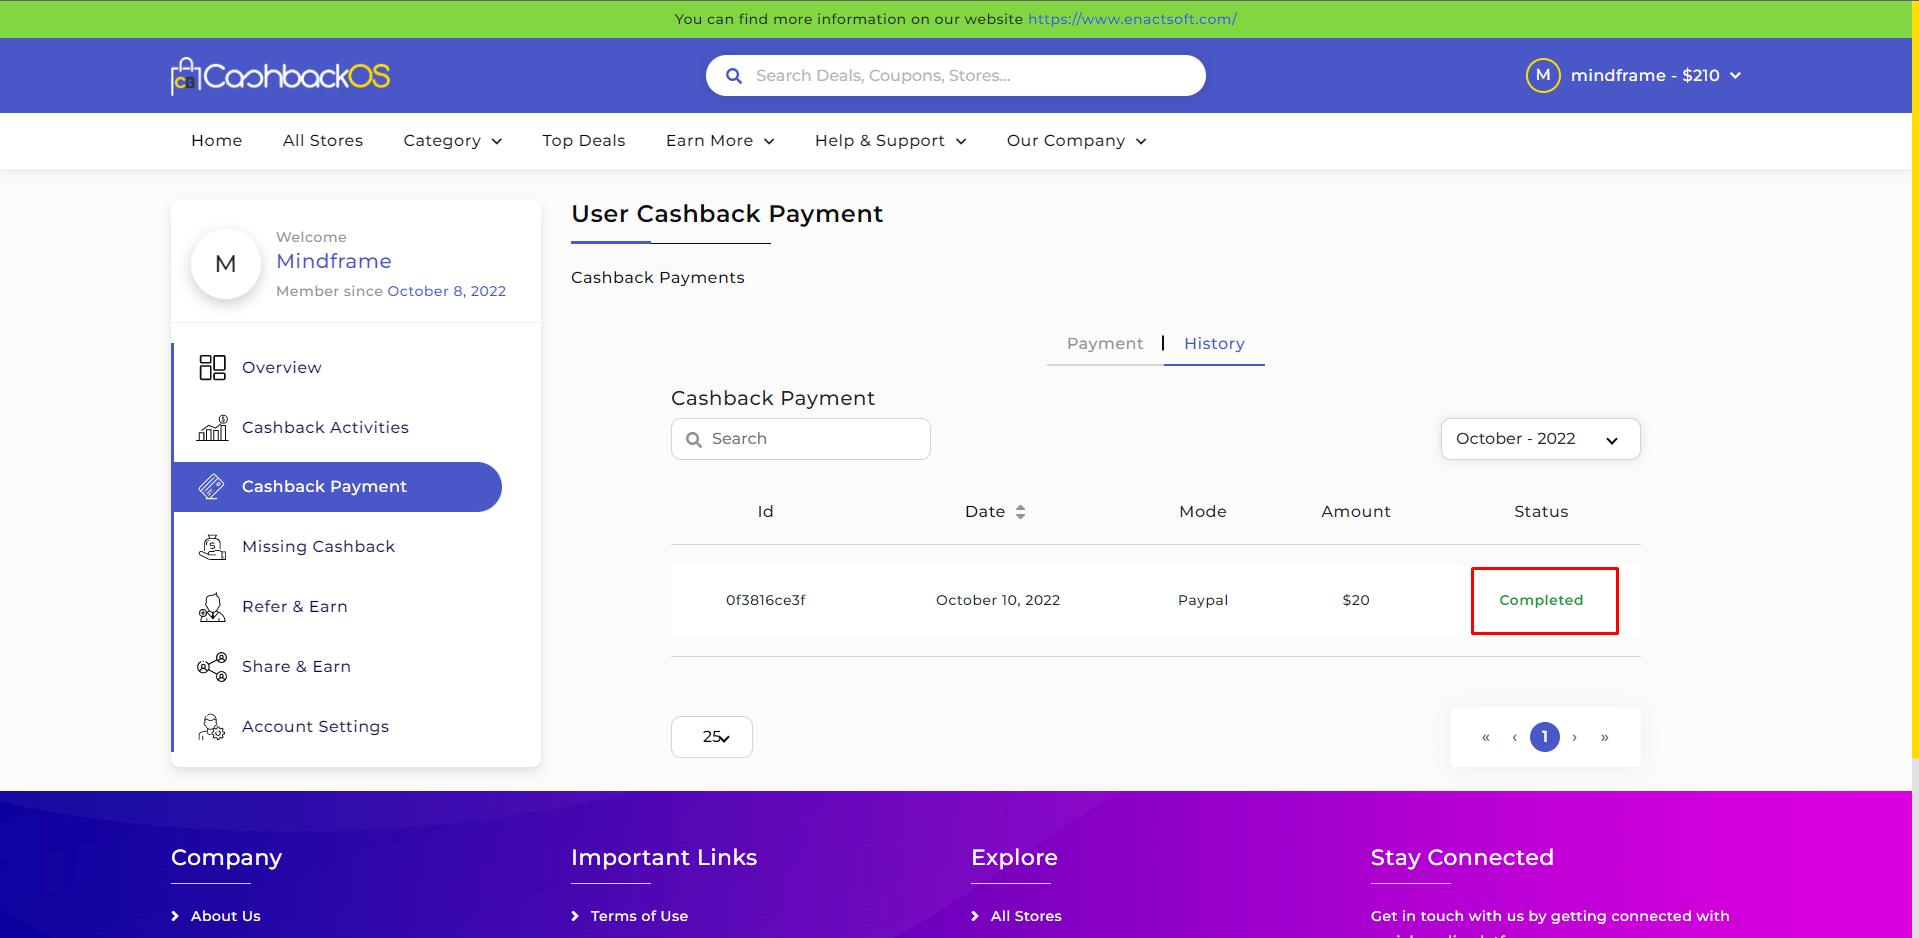
User email notification – payout successful.
#

Here mail received on your registered mail that you received payout successfully.


