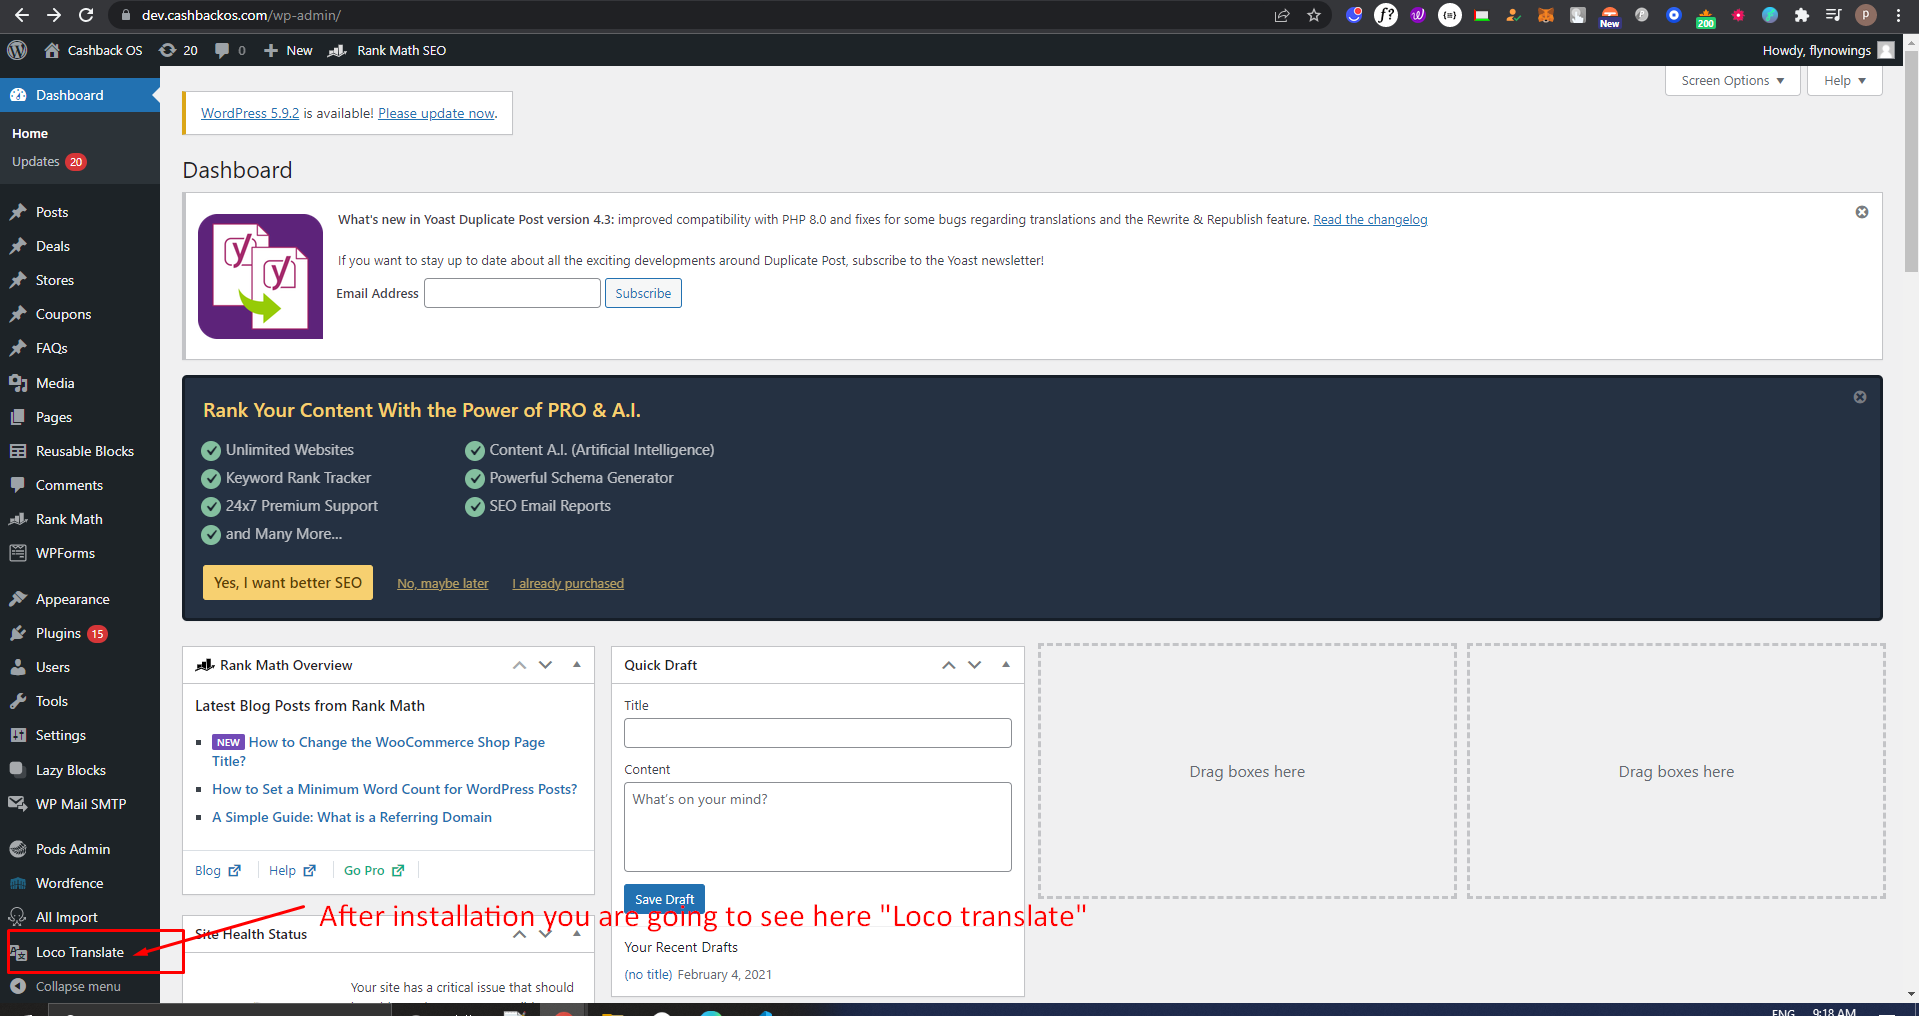
Install Translation plugin i.e. “Loco translate” https://wordpress.org/plugins/loco-translate/
After installation, you are going to see the “Loco translate” in the WordPress side menu bar
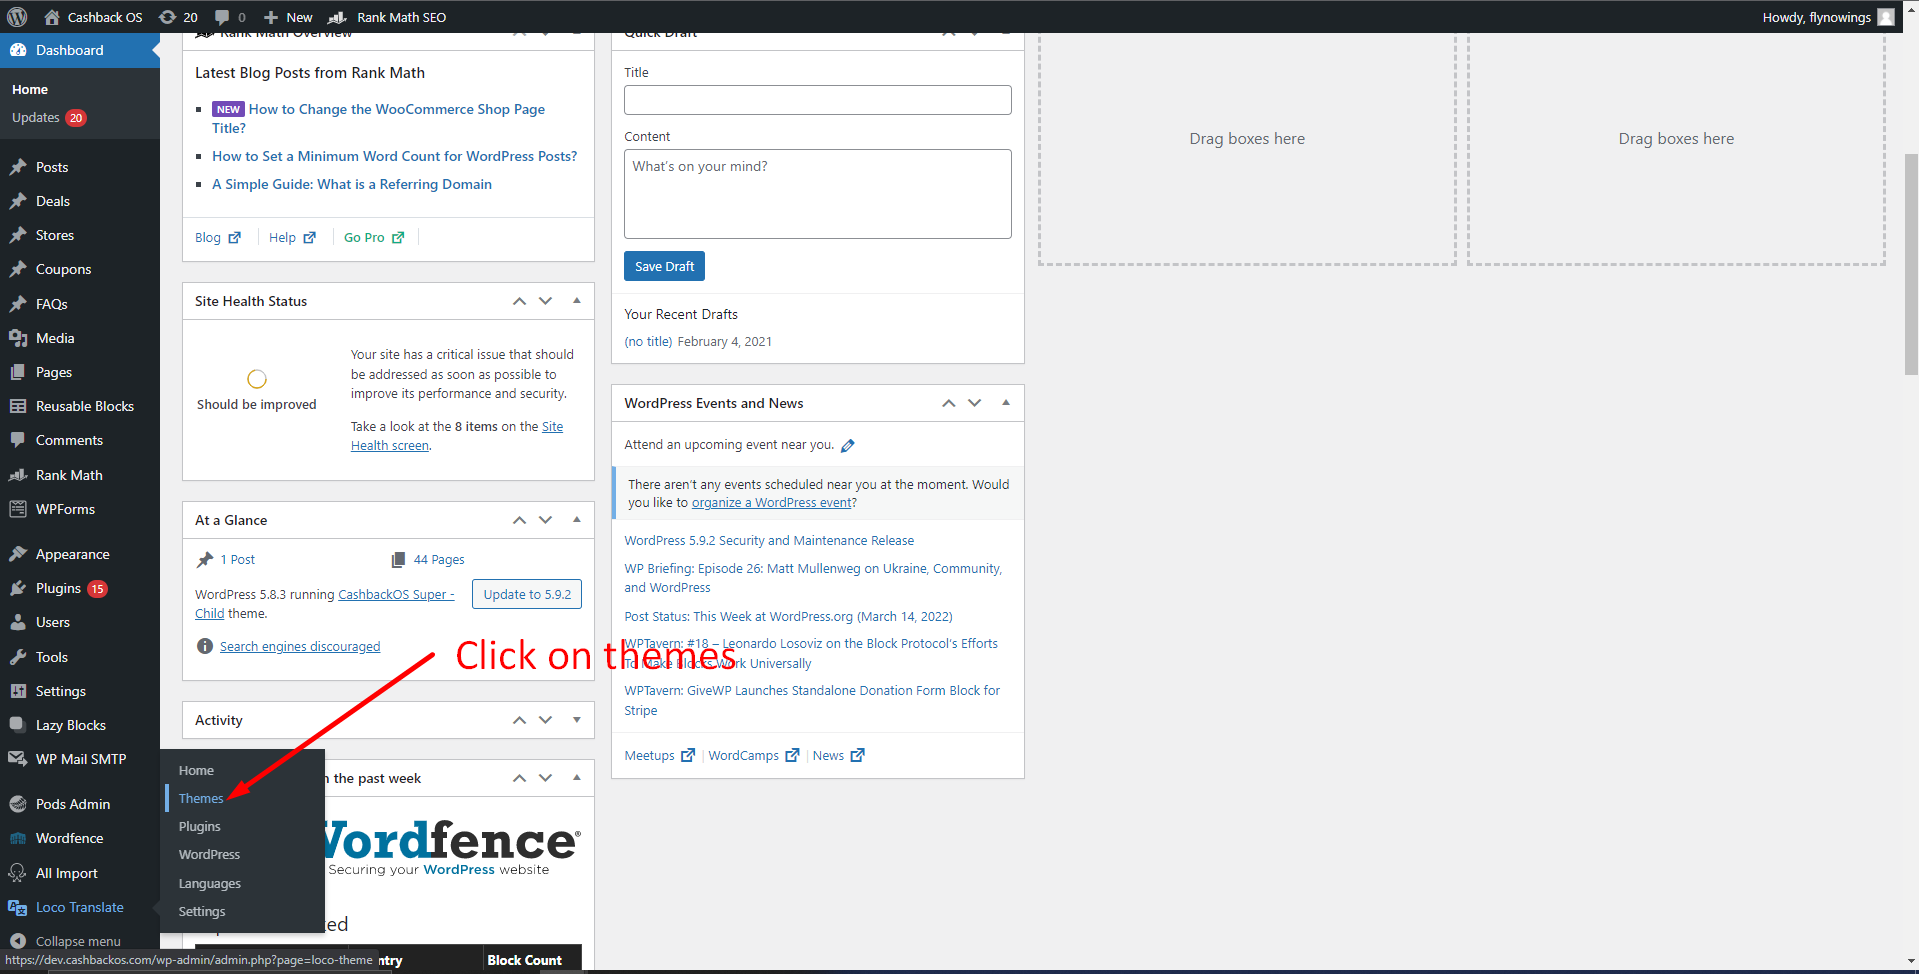
First, go to the themes option from the Loco translate menu
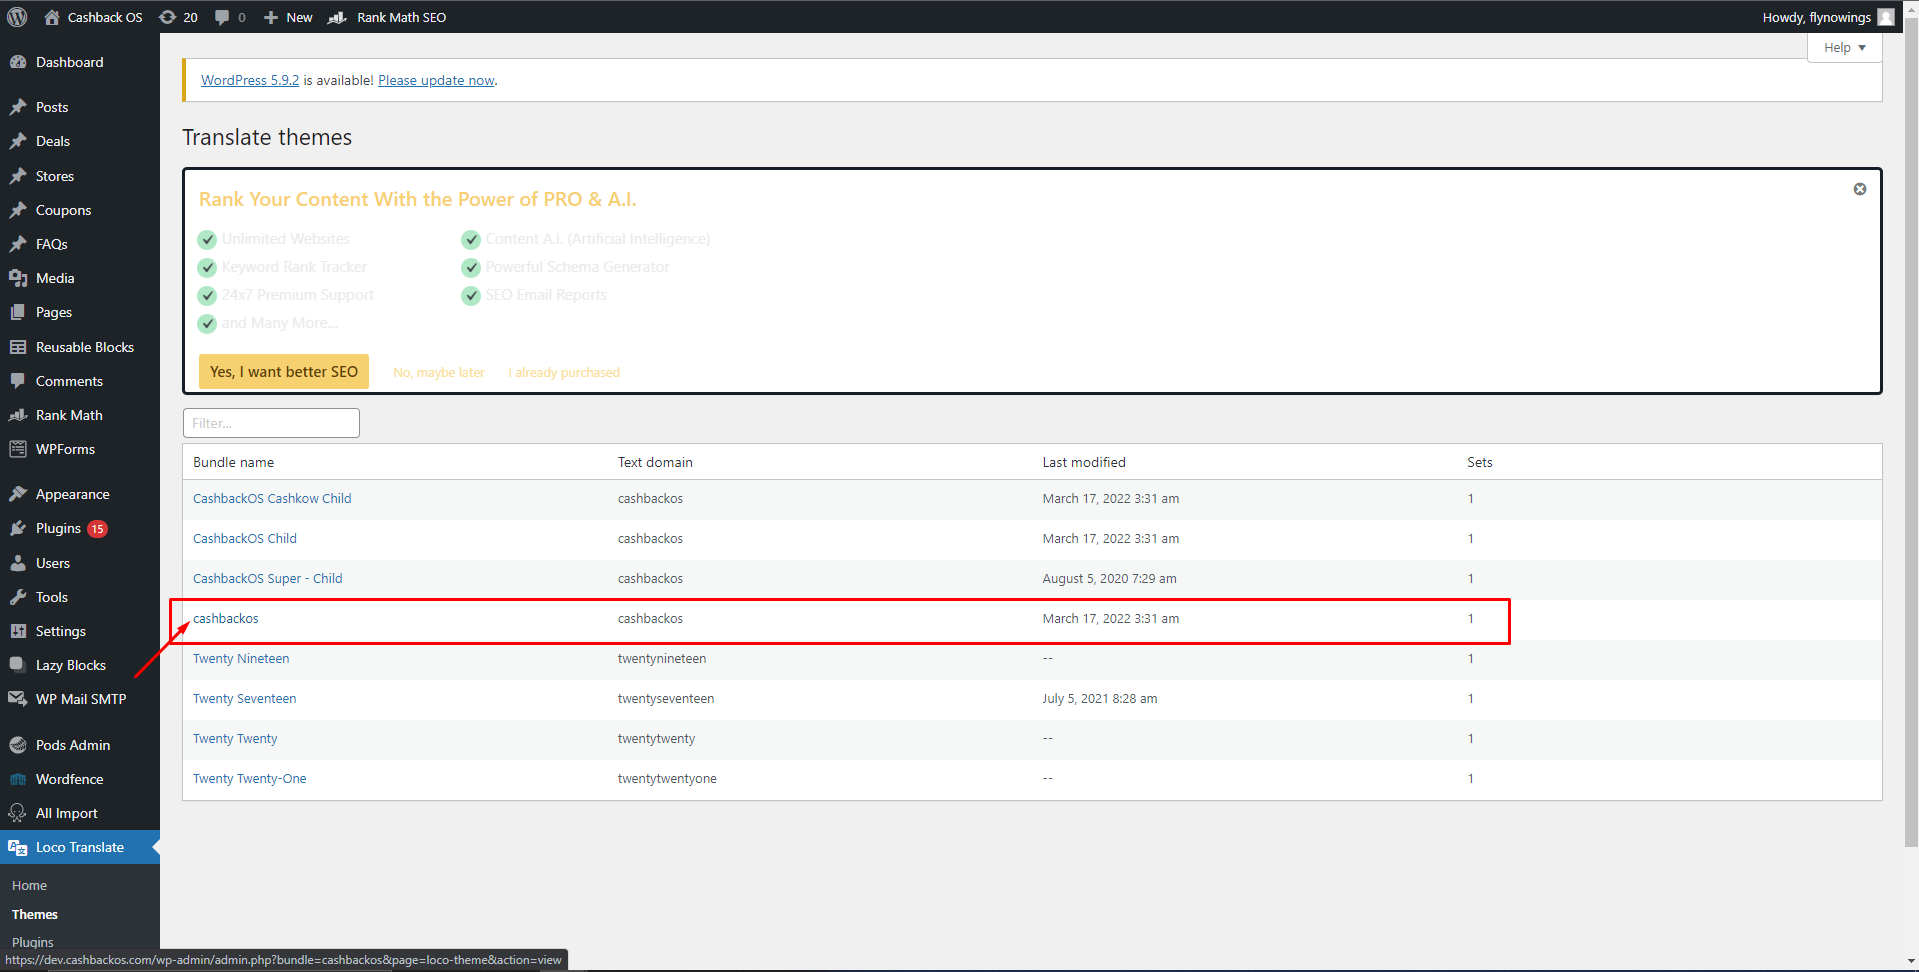
Select your themes like here we have selected “Cashback OS”
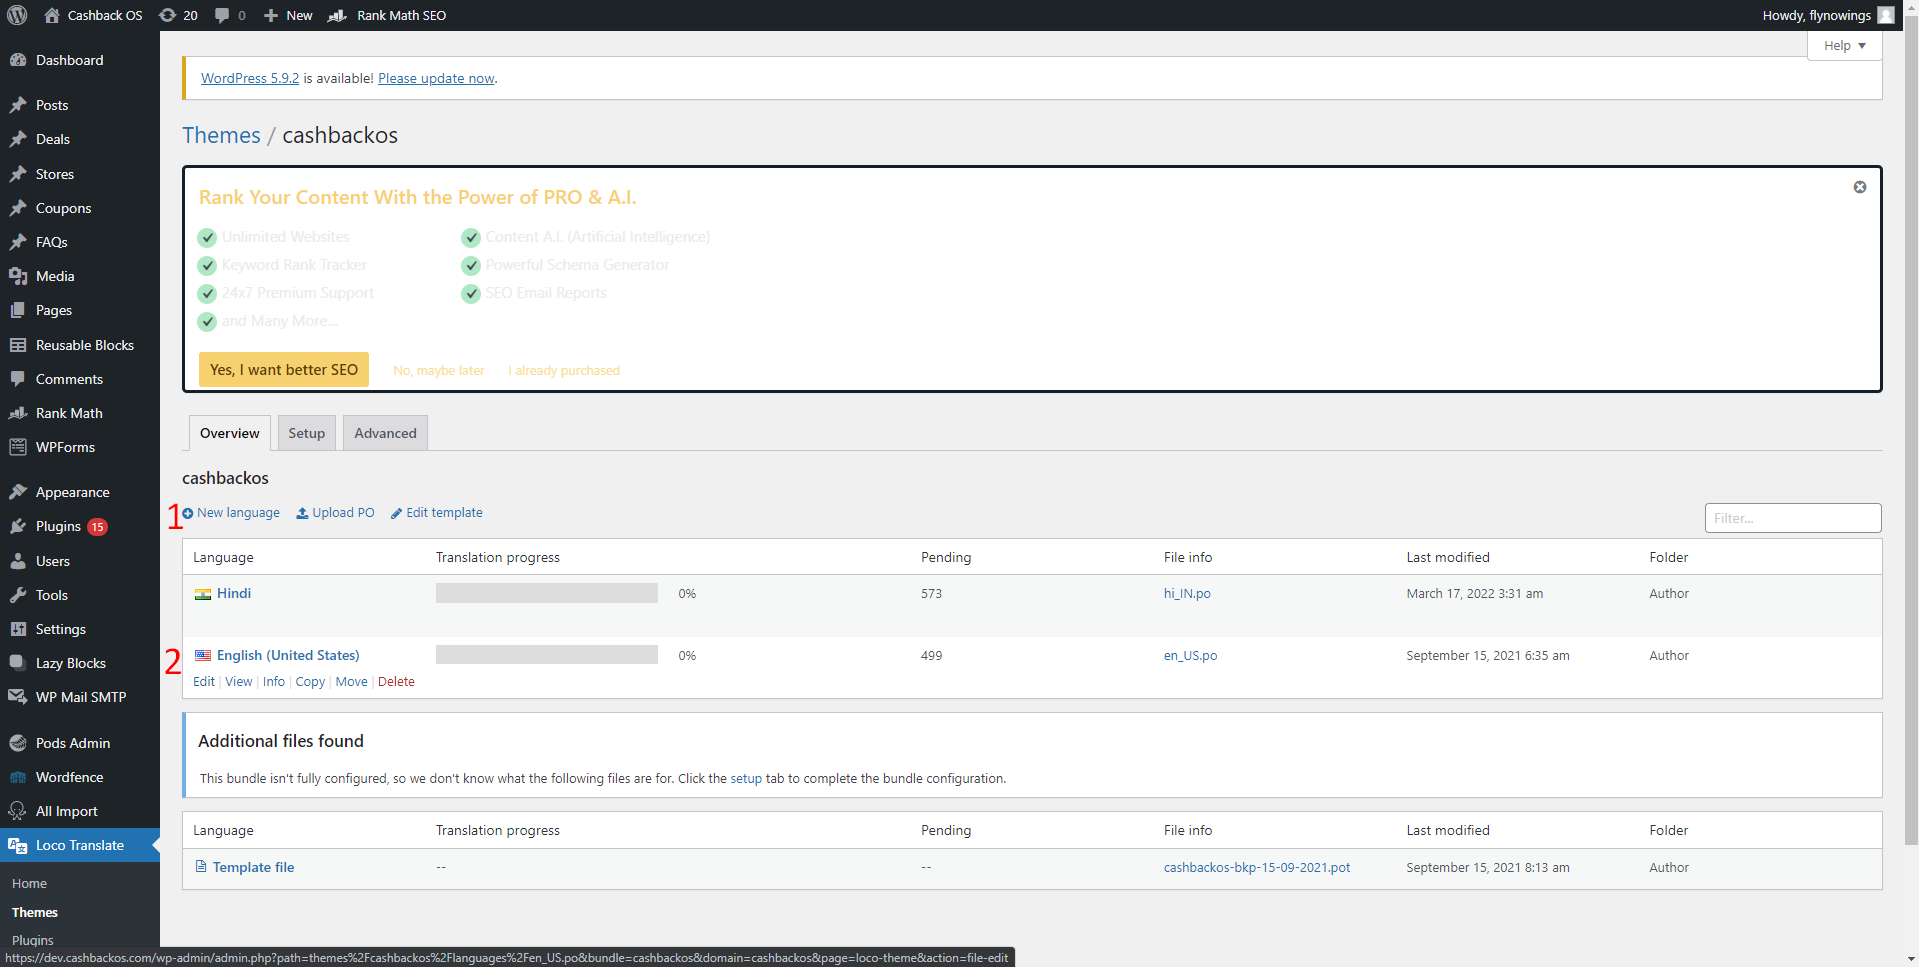
- Click on new language button to add language
- After adding the language it is going to show the list here
Click on new language button. #
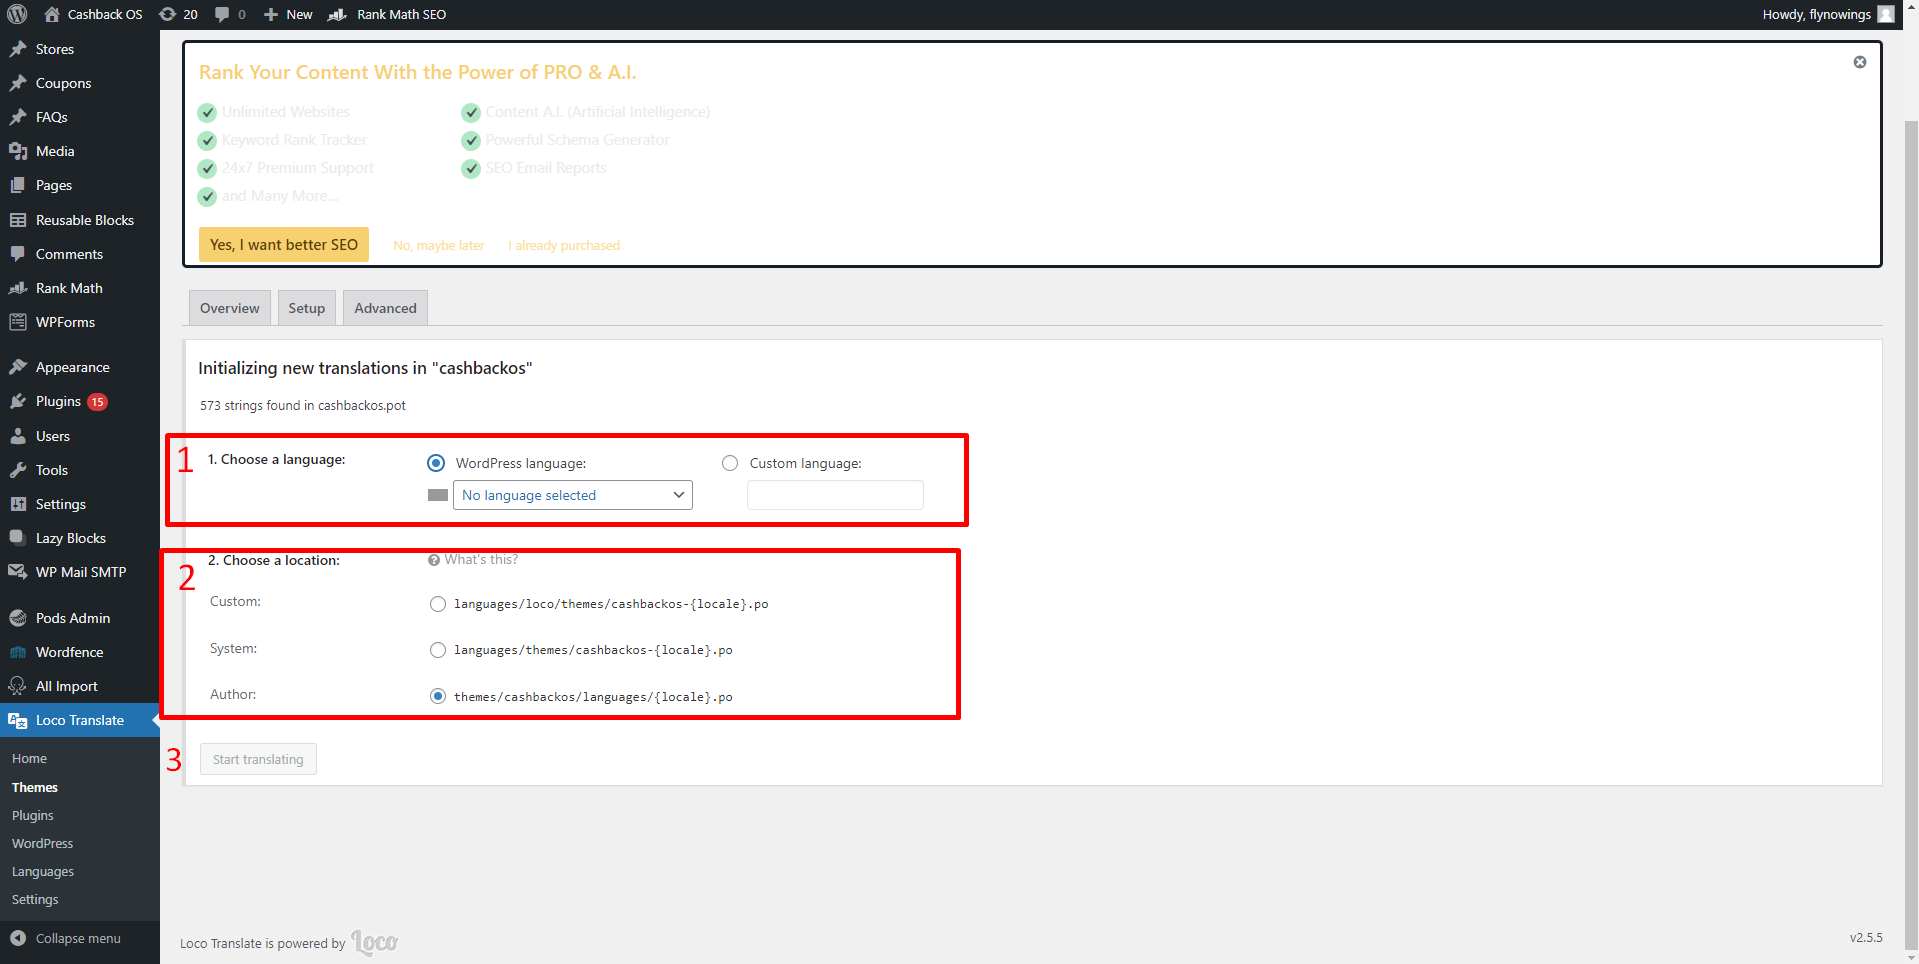
- Choose your language.
- Select author option from here.
- click on Start translating button.
Selecting the language from the list #
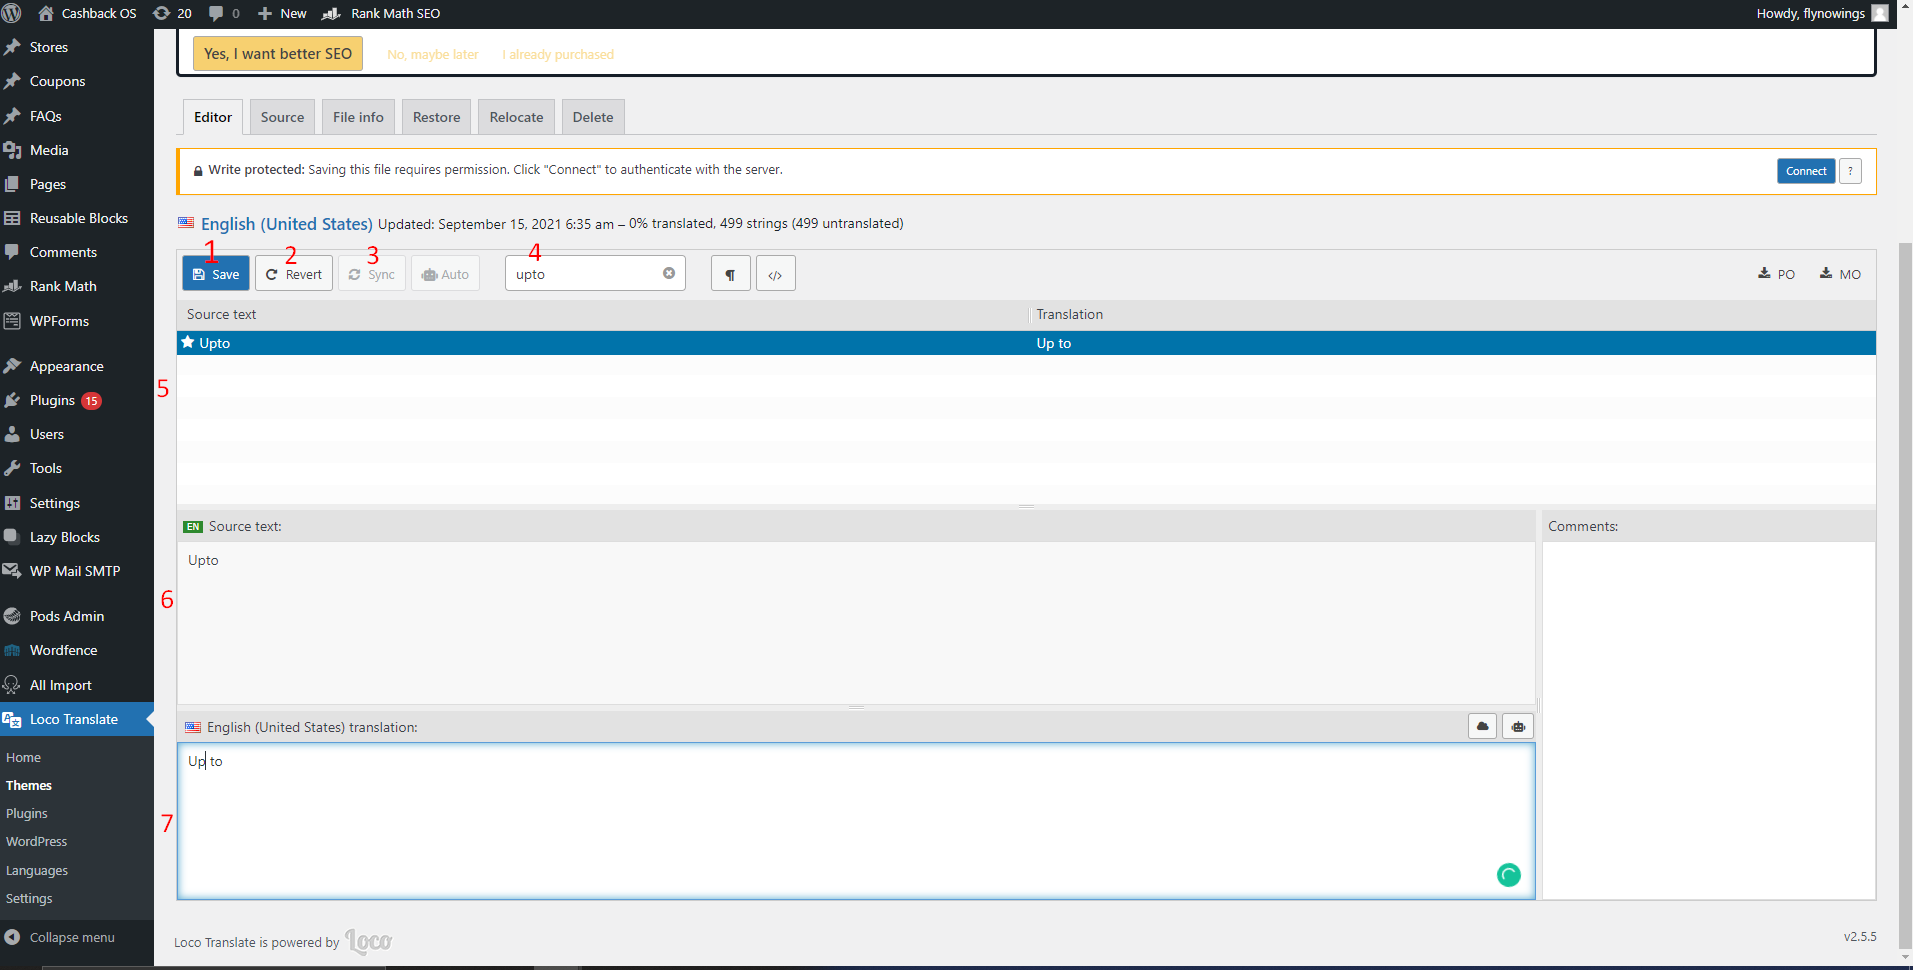
- To save the record.
- To revert the record whichever it saved.
- Sync the record once.
Note:- Sync the record once whichever newly added source text will come here after syncing please save it once. - To seach any record from the list
Note:- To search any record from the Source text listing - Number of Source text i.e. label is shown here from your website
- The source text whichever you selected will show here
- Manually enter the translation text here by your choice to display in front-end side.


