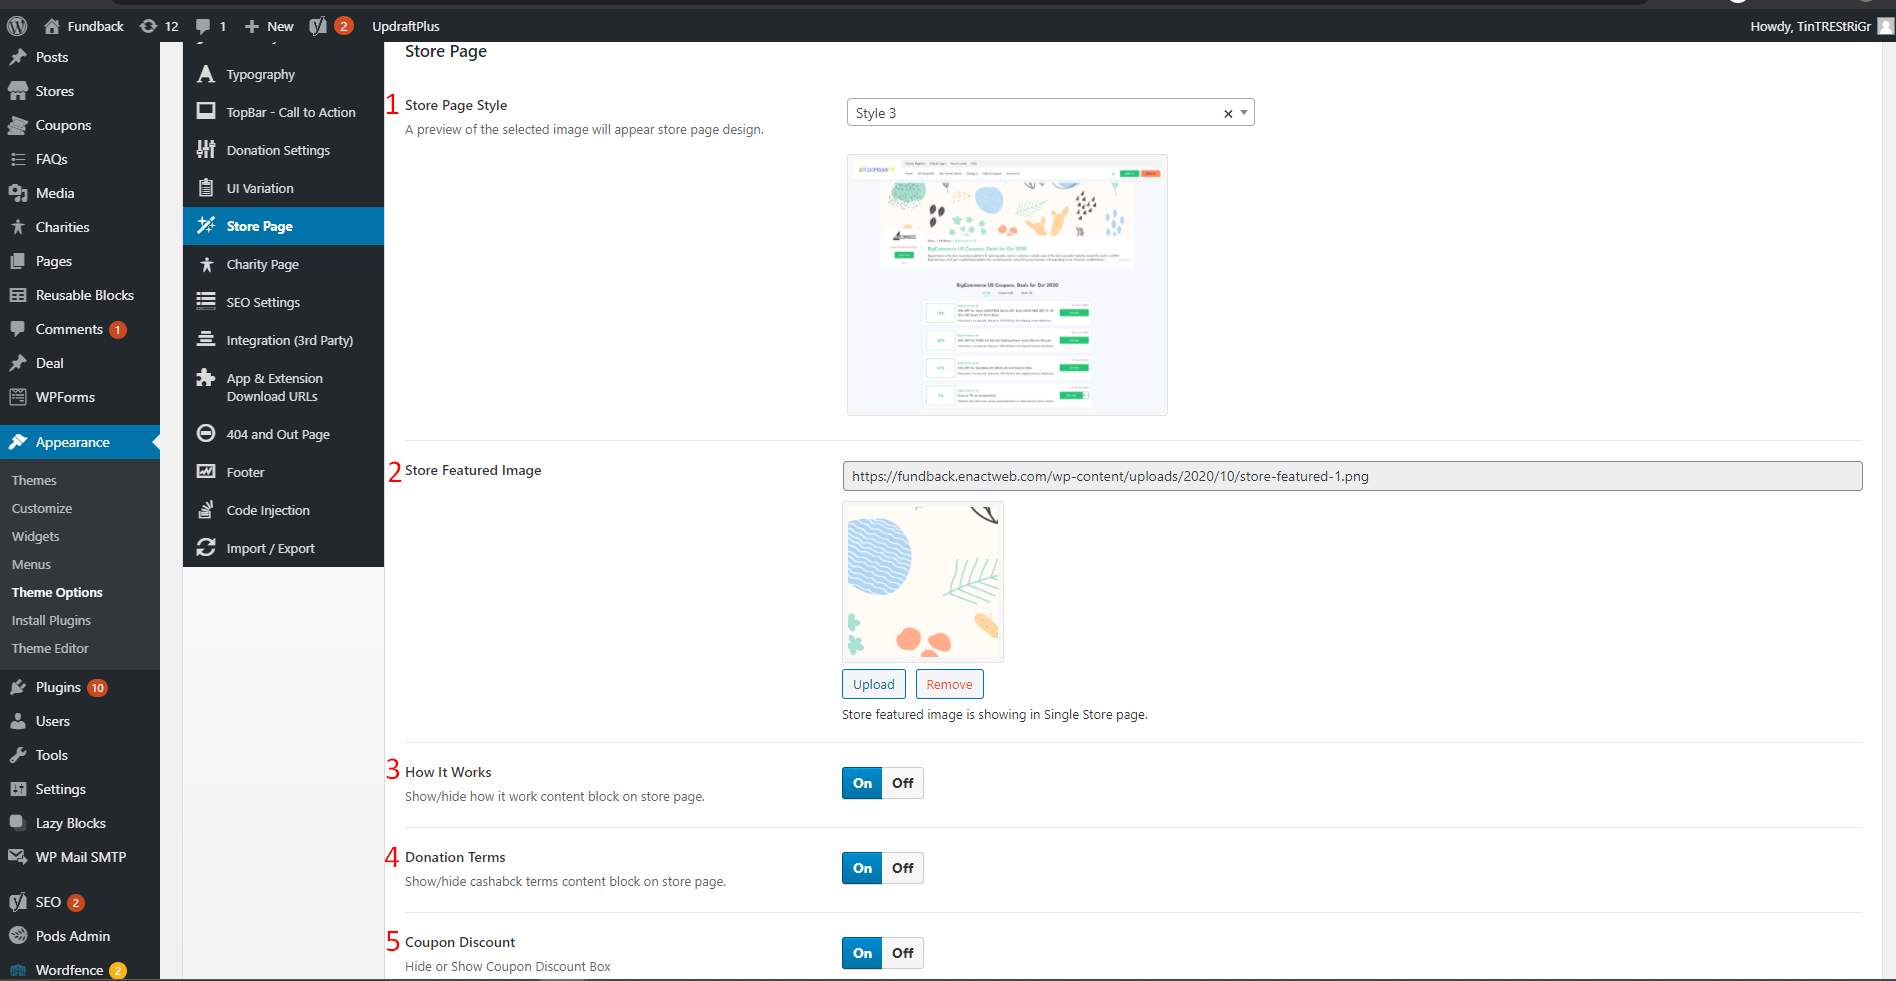
Upload Store featured image by clicking on the upload button.
Show/hide how it work content block on the store page.
Show/hide Donation terms content block on the store page.
Hide or Show Coupon Discount Box.
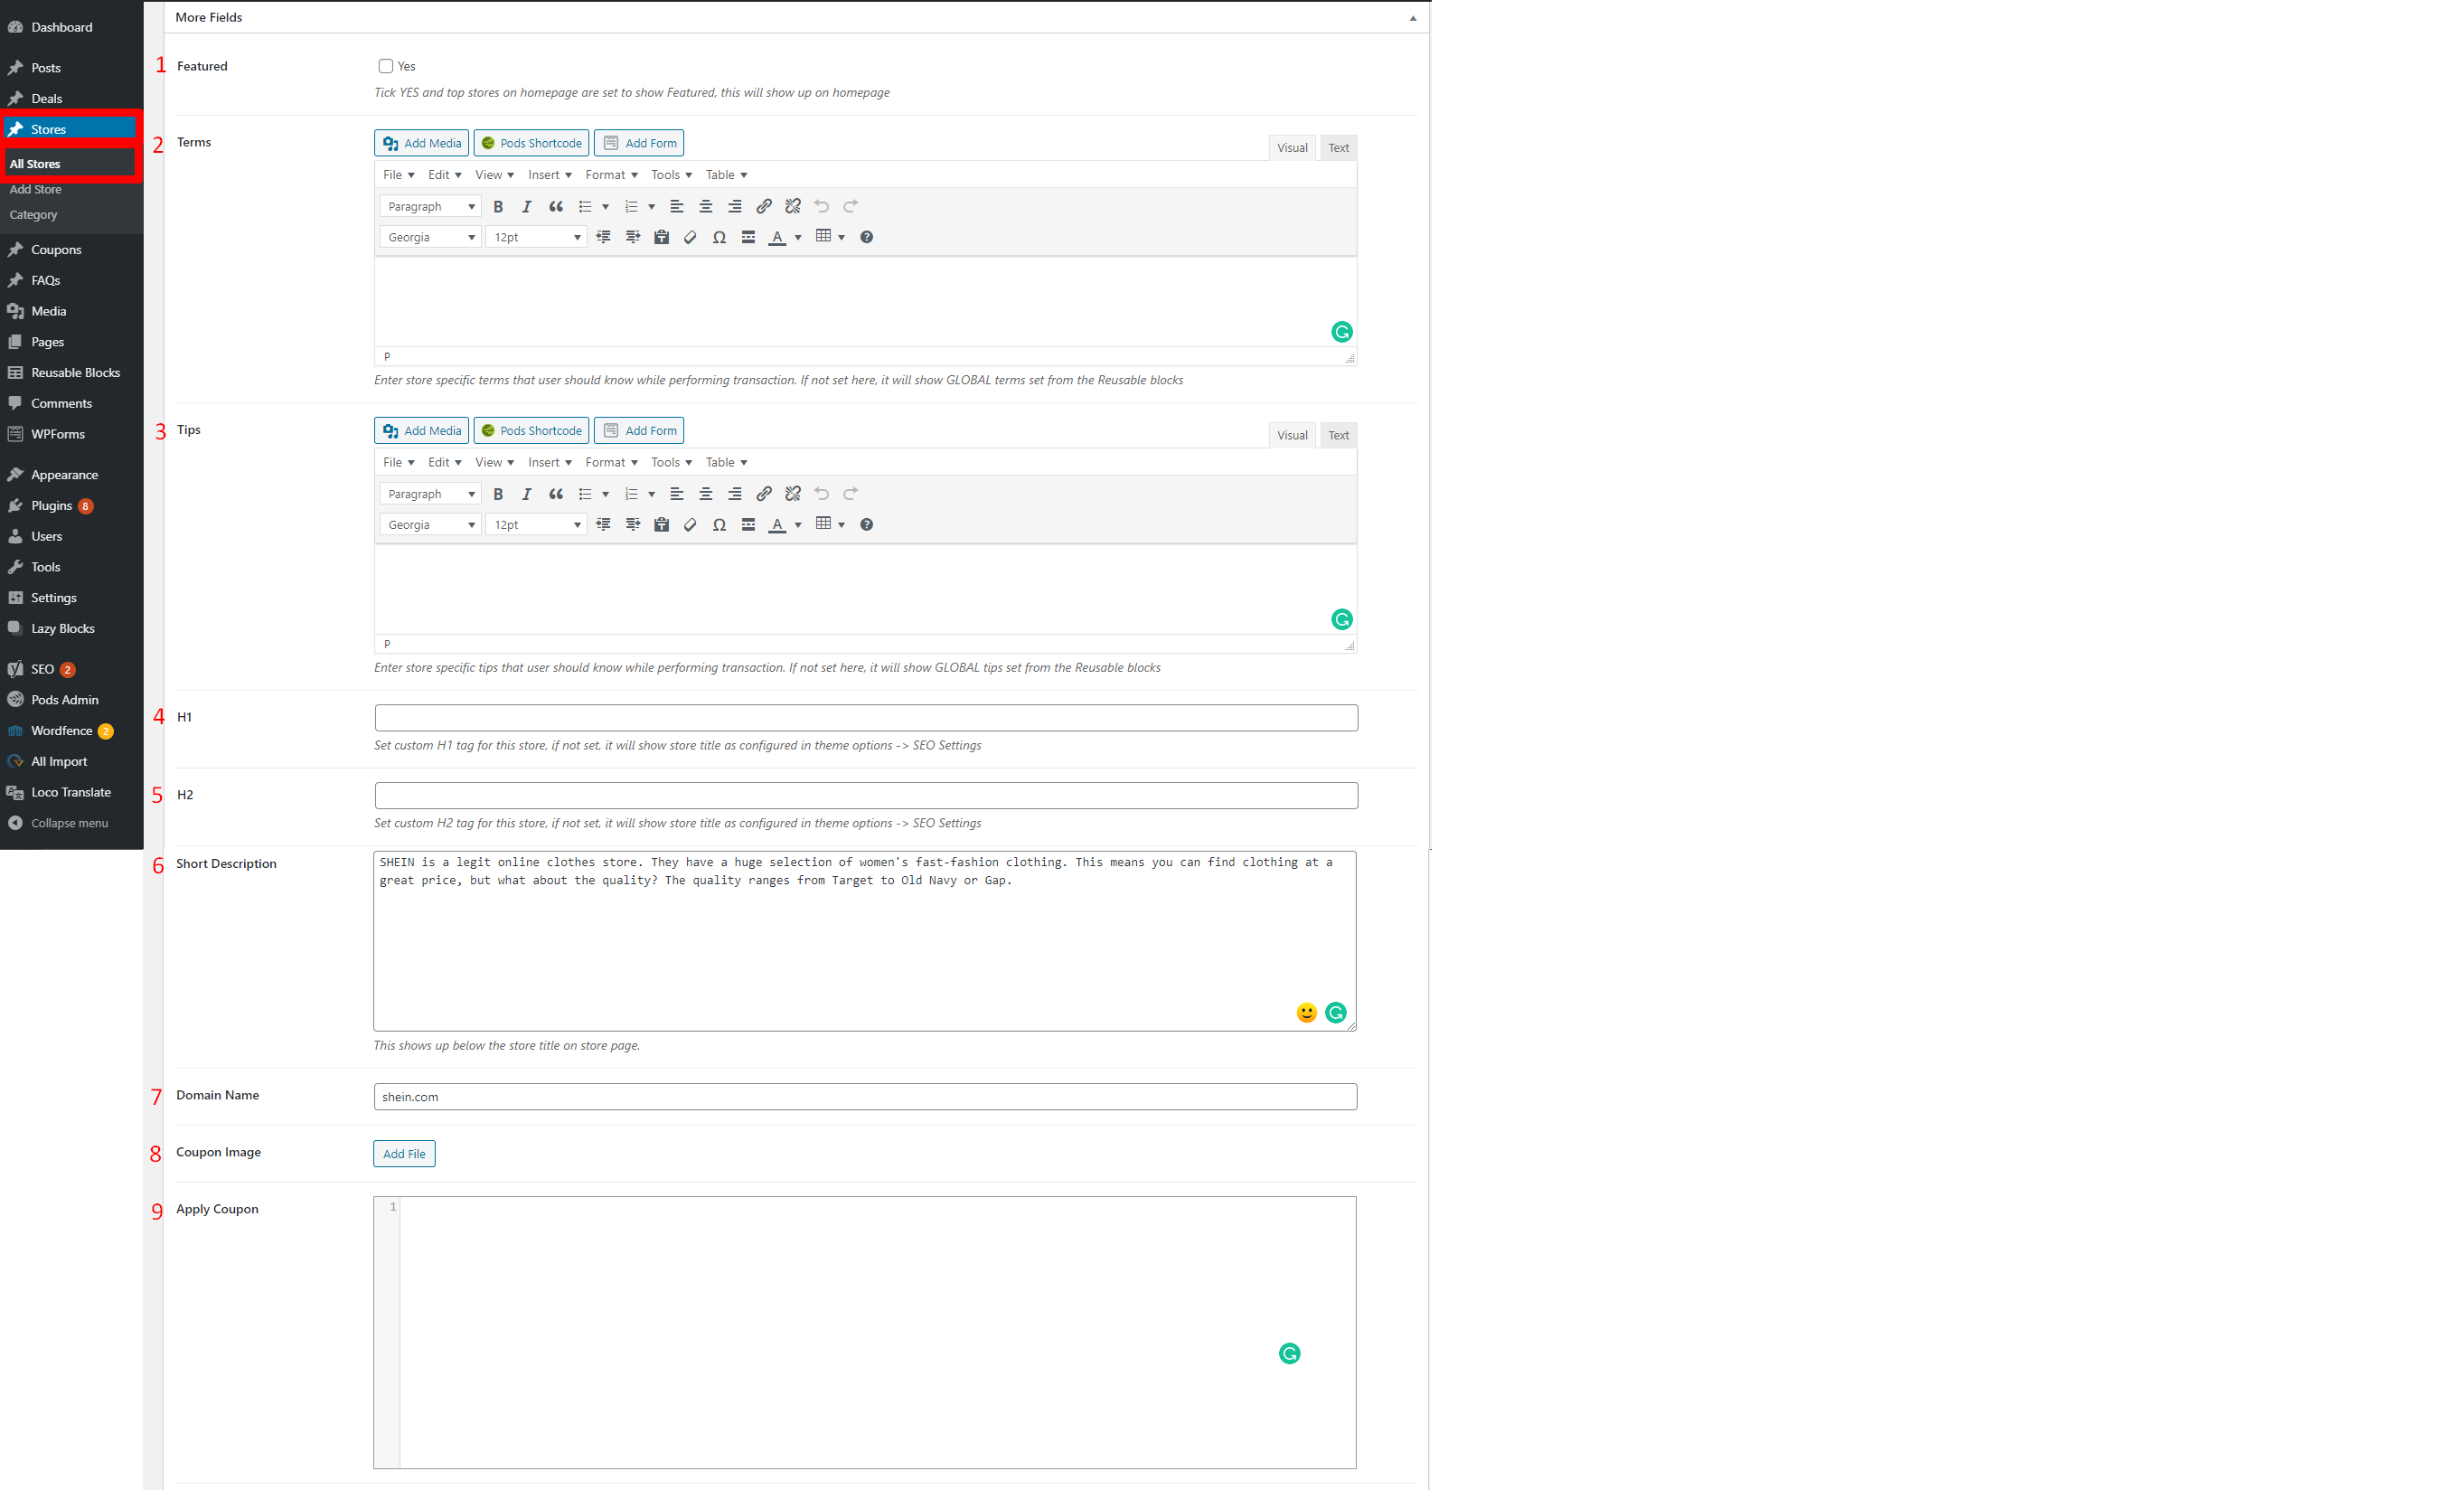
If Is Featured is ON then that specific store comes under feature logic otherwise not.
Enter store-specific terms that users should know while performing transactions. If not set here, it will show GLOBAL terms set from the Reusable blocks
Enter store-specific tips that users should know while performing transactions. If not set here, it will show GLOBAL tips set from the Reusable blocks.
Set custom H1 tag for this store, if not set, it will show store title as configured in theme options -> SEO Settings. Note:-Header tags are an important on-page SEO factor because they’re used to communicate to the search engines what your website is about. The h1 tag should contain your targeted keywords, ones that closely relate to the page title, and are relevant to your content. Visit WordPress Admin Panel->Appearance->Theme Option->SEO Settings.
Set custom H2 tag for this store, if not set, it will show store title as configured in theme options -> SEO Settings. Note:-The h2 tag is a subheading and should contain similar keywords to your h1 tag. Visit WordPress Admin Panel->Appearance->Theme Option->SEO Settings.
This shows up below the store title on the store page.
Enter the Domain Name. Note:- A domain name is an address where Internet users can access your website. A domain name can be any combination of letters and numbers, and it can be used in combination with the various domain name extensions, such as .com, .net, and more.
Upload the Coupon Image by clicking on Add File button.
Enter the Coupon which is applied.
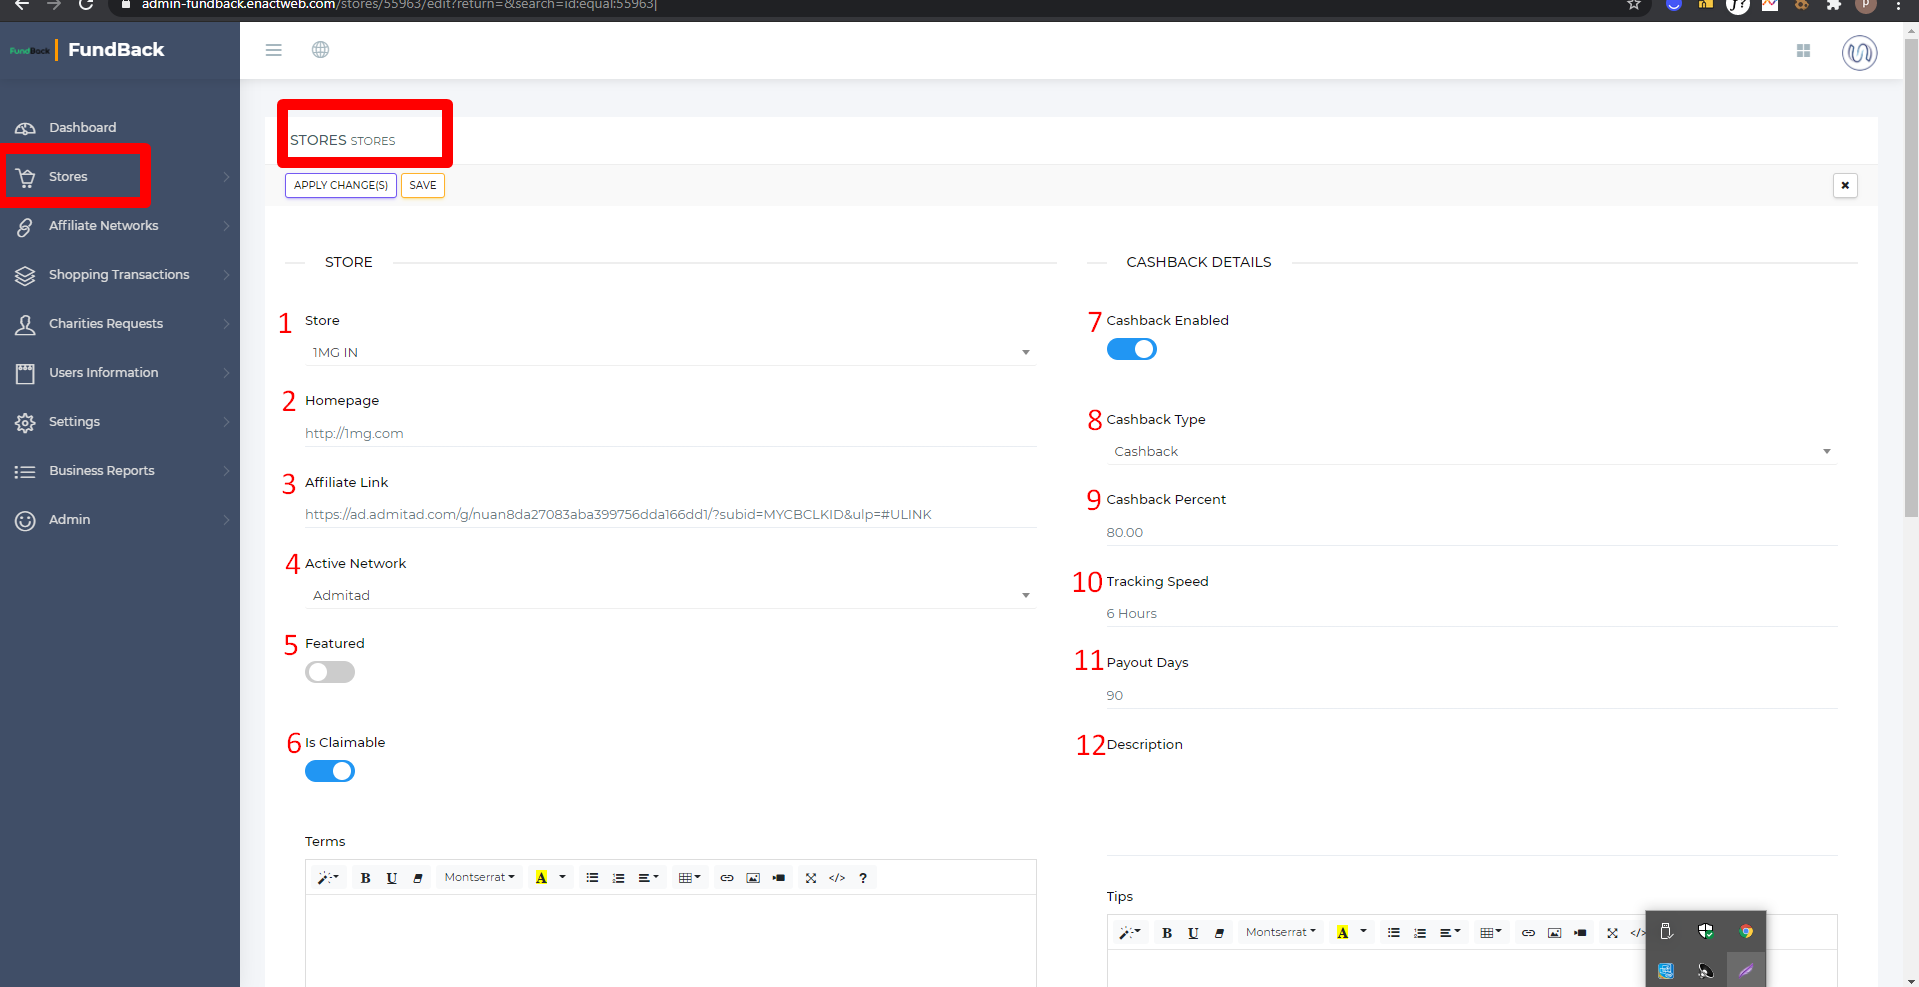
Enter the Store Name.
Enter the Home Page URL.
Enter the Affiliate Link.
Select Active Network from the drop-down list.
If Is Featured is ON then that specific store comes under feature logic otherwise not.
If Is Claimable is ON then Cashback claim is honored by the network/merchant and it is shown on the front side as “Missing Cashback Claim: Yes” otherwise it’s not.
When Cashback Enabled is ON it is going to provide cashback to the user, if disabled it’s not.
Select the Cashback Type from the drop-down list.
Enter the Cashback Percent of the end-user. Note:-The cashback Percent is provided to the end-user from the Merchant commission. for example:- here merchant commission is 10% and cashback percent is 80% then the actual cashback percent is provided to the end-user will be 8% and on the front end side that 8% is only going to show.
Enter Tracking Speed.
Enter the Payout Days.
Enter the Description.
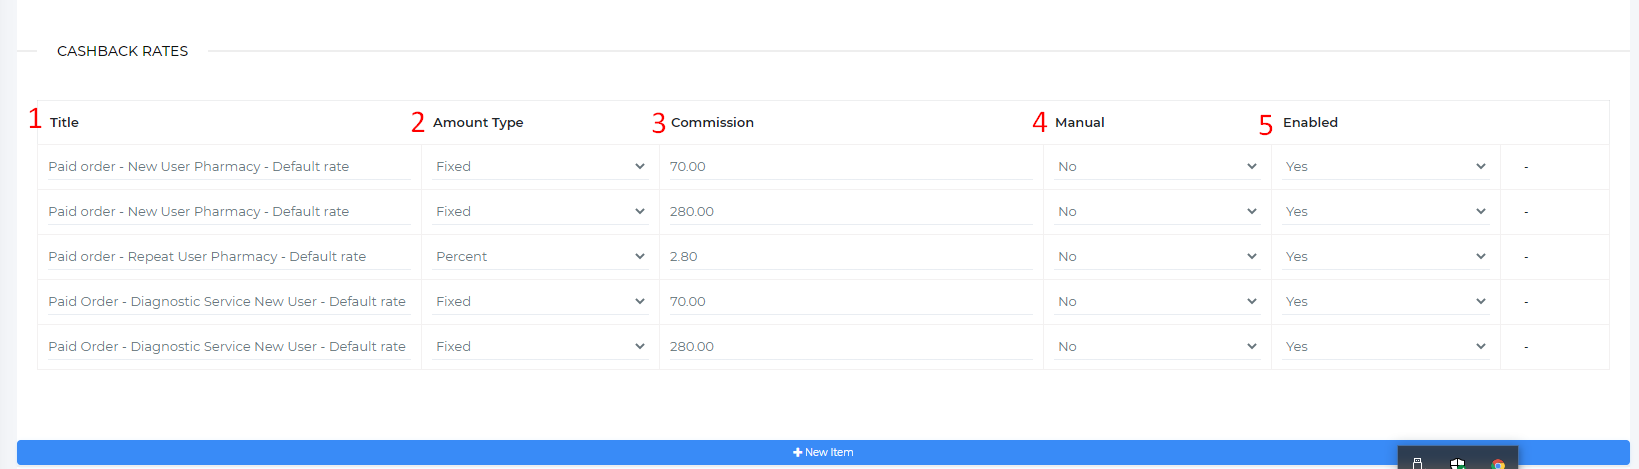
Enter the Title of the store.
Select Amount Type from the drop-down list.
Enter the Commission of the Merchant side.
Select Manual type yes/no from the drop-down list. Note:- If manual entry then yes is selected from the drop-down box.
Select Enabled type yes/no from the drop-down list. Note:- If yes is selected from the drop-down box then the content is shown on the front end side otherwise not.
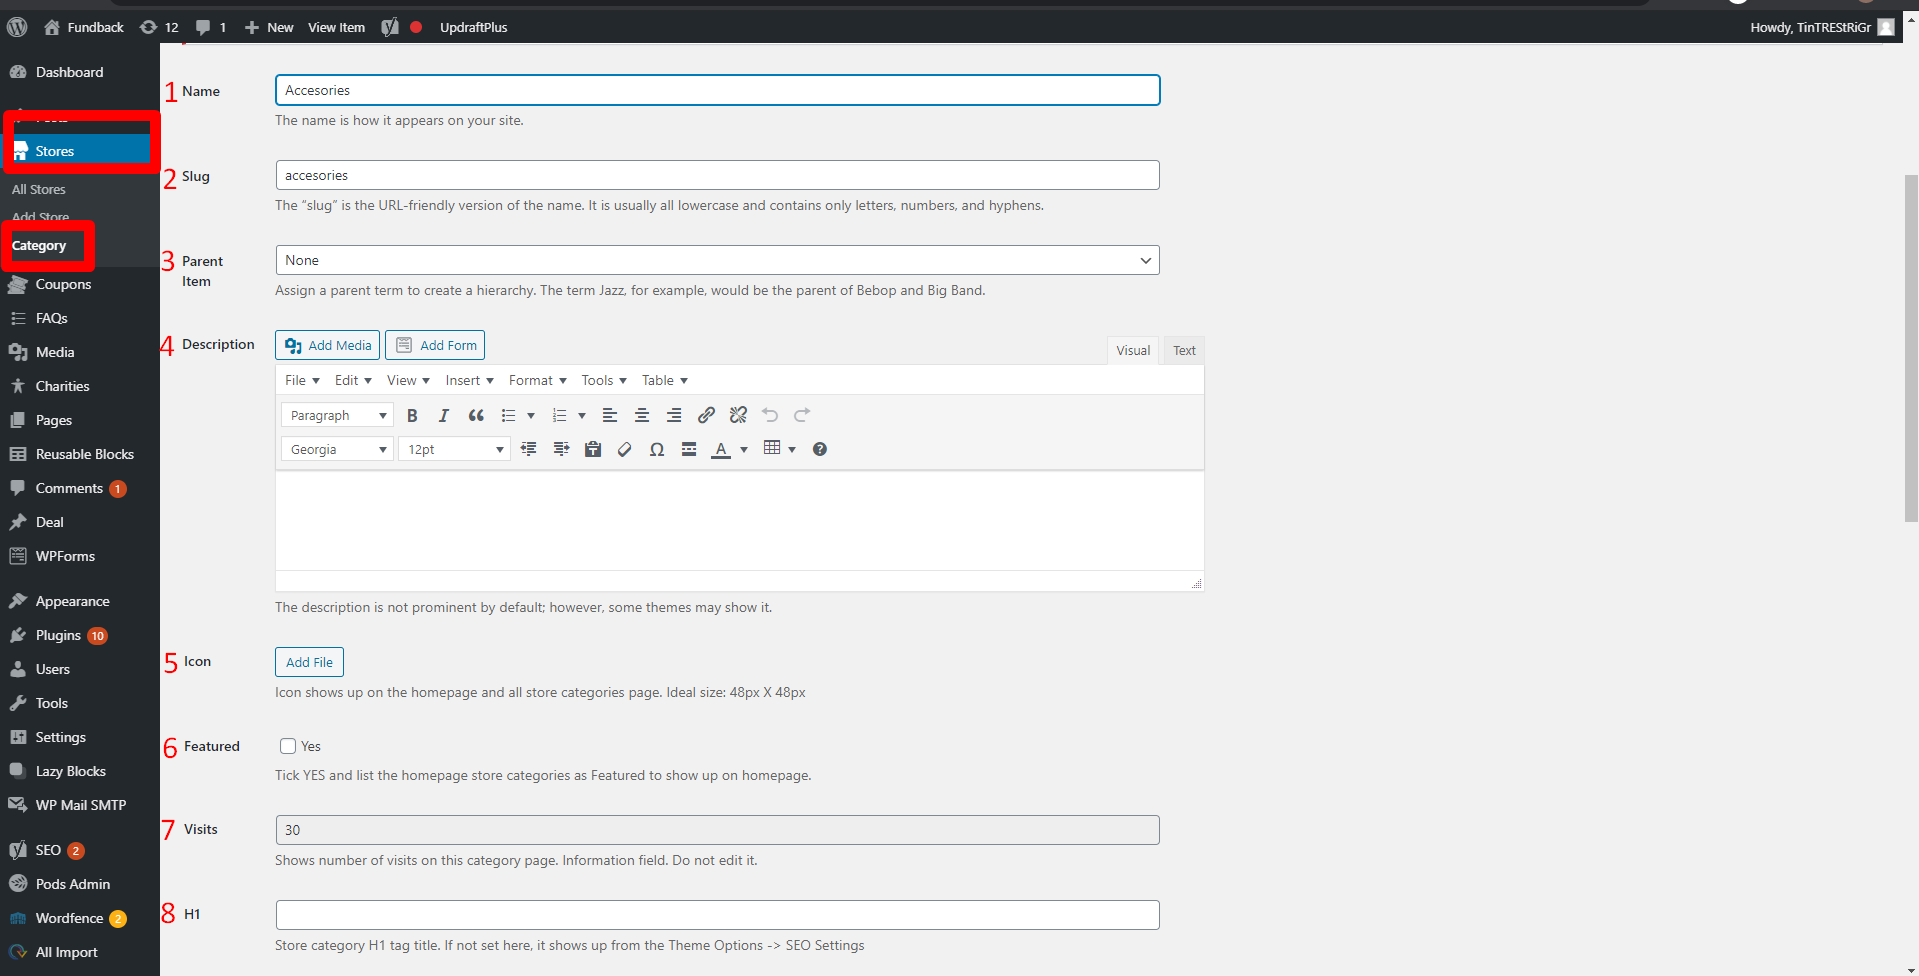
Enter the Name. Note:- The name is how it appears on your site.
Enter the Slug. Note:- The “slug” is the URL-friendly version of the name. It is usually all lowercase and contains only letters, numbers, and hyphens.
Select Parent Item from the drop-down list.
Enter the Descriptions.
Upload the Icon by clicking on the button. Note:- It is going to show on the front end side as a Category Icon.
Tick YES and list the homepage store categories as Featured to show up on the homepage.
Shows the Number Of Visits on this category page. Information field. Do not edit it.
Enter the H1 TAG. Note:- Store category H1 tag title. If not set here, it shows up from the Theme Options -> SEO Settings.