Login Page #

Steps:-

- Upload Background Image by clicking on the button.
- Enter the Welcome Title.
- Enter the Welcome Sub Title.
- Enter the Welcome Description.
- Welcome Steps
- Choose Icon by clicking on the button.
- Enter the Title.
- Enter the Descriptions related to the title.
- Add a step by clicking on the Add Step button.

- Enter Login Form Title.
- Enter Submit button name.
- when Login with Social is ON then it’s allowed to login with social media otherwise not.
- Enter the Style from the drop-down list.
How to enable social media login #
Google Login #
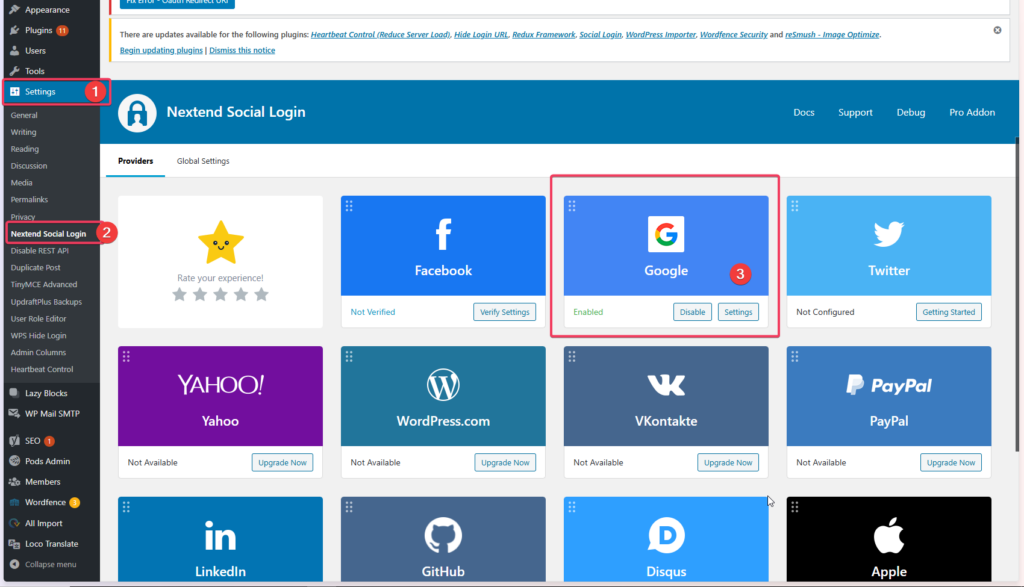
- Visit the WordPress Admin panel and go to settings
- Click on next end social Login
- Select the Google account and click on getting started ref at https://img.enacton.com/ShareX/2025/03/Arc_ibXIWTdx4B.png
- Now follow the instruction which was given there on the page ref at https://img.enacton.com/ShareX/2025/03/Arc_YBPU8G8yLK.png you can refer this doc to configure google login at https://drive.google.com/file/d/1TuJOS2dMi7C6MVM1wkMu7t0rUSuIfi8g/view
- Go to the settings, enter the Client ID and client Secret, and save the details ref at https://img.enacton.com/ShareX/2025/03/Arc_MlkOLJmHo6.png
Facebook Login #
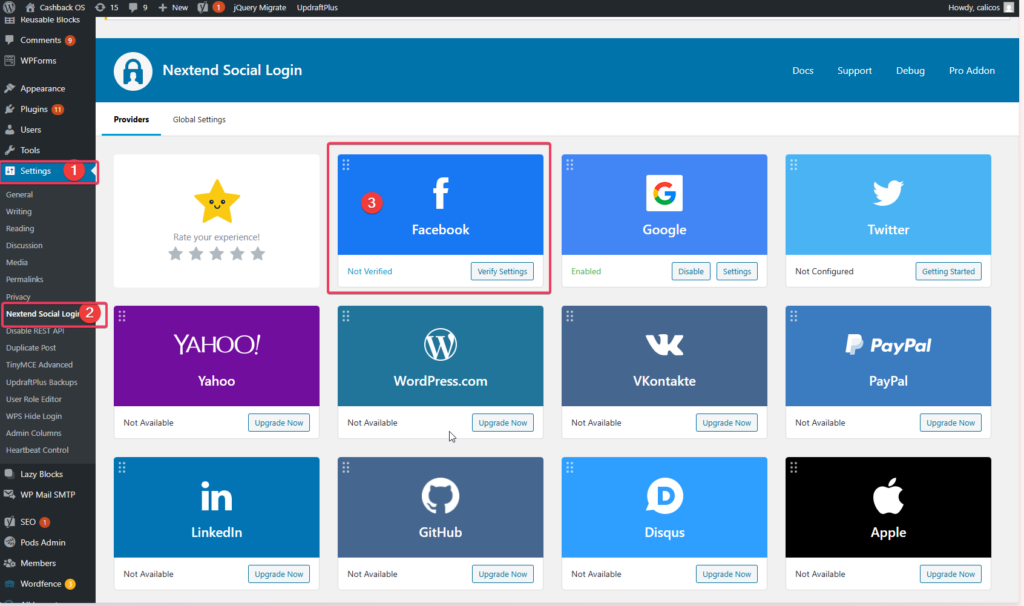
- Visit the WordPress Admin panel and go to settings
- Click on nextend social Login
- Select the Facebok account and click on getting started ref at https://img.enacton.com/ShareX/2025/03/Arc_cepX71U2Qo.png
- Now follow the instruction which was given there on the page ref at https://img.enacton.com/ShareX/2025/03/Arc_WUH8JrUcqu.png you can refer this doc to configure facebook login at https://drive.google.com/file/d/1bbJYWrdgVCQCrHSR92EucmzQJ1b-pAPN/view
- Go to the settings, enter the App ID and App Secret, and save the details ref at https://img.enacton.com/ShareX/2025/03/Arc_kUtEFEDpRn.png


